Cart
0
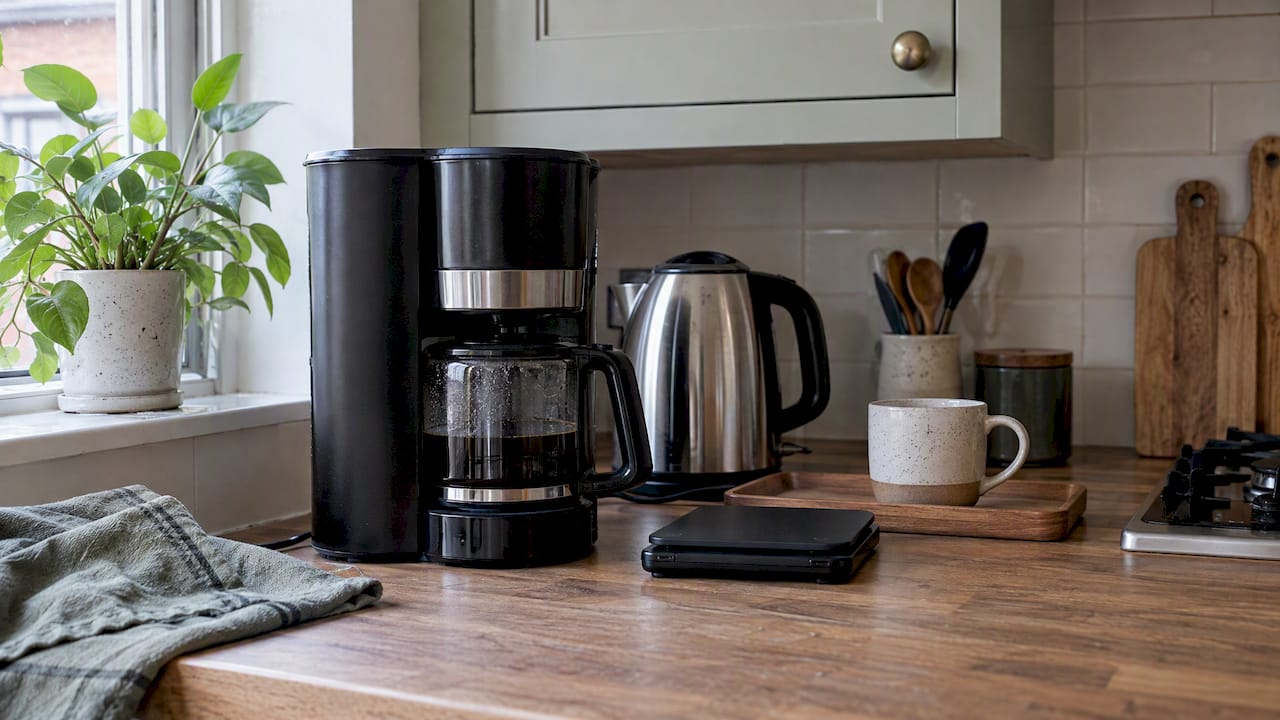
The simplest reliable coffee station setup needs a dedicated surface, a power socket within reach, a water source or a clear refill plan, a machine sized to your routine, and basic storage for beans and cups. Pick your spot, check the nearest outlet, clear the surface, and add one styling touch such as a tray or a ceramic jar from our kitchen collection.
TL;DR:
- Position the machine 60–90 cm from an outlet, keep sockets 300 mm from the sink, and use a registered professional for new circuit work.
- Choose pods for speed and a small footprint, pour over for control with a kettle, dripper, and scale, or espresso if counter space fits a grinder.
- Group tools into grind, brew, and serve zones, keep daily essentials within one step, and store weekly supplies farther away to protect counter space.
Table of Contents
- Layout and workflow: place your machine where power, water and storage meet
- Equipment essentials: matching your machine to your routine and your counter
- Storage and organisation: keep beans, cups and tools within reach
- Styling and finishing touches that make the corner feel intentional
- Cristiano and Homable: expertise behind this guide
- Cleaning and maintenance tips for coffee station equipment and surfaces
- Ergonomic considerations to reduce clutter and effort
- Sustainability: eco-friendly choices and waste management for your station
- A single realistic starter setup worth copying
- Finishing touches from our collection
- FAQ
- Sources
Layout and workflow: place your machine where power, water and storage meet
Designers often talk about the kitchen work triangle, and a coffee corner benefits from a smaller version of the same idea. The coffee maker triangle puts your power source, water source and storage within easy reach of each other, so the whole routine takes fewer steps and fewer backtracks across the room.
In a worktop corner, that usually means siting the machine near an existing socket, with beans or pods in a drawer or canister directly below or beside it, and a small jug or kettle within arm’s reach. In an alcove or a dedicated cupboard, the same logic applies vertically: machine at eye to chest height, storage below, cups above.
Give the surface enough room for the whole task, not just the machine itself:
- Allow space to measure and grind beans without knocking the machine.
- Keep a clear patch for tamping, setting down a cup, or staging a pour-over dripper.
- Leave room beside the machine for a milk jug or steaming pitcher if you make lattes.
On sockets, keep the station within roughly 60 to 90 cm of an existing outlet so you avoid trailing extension leads across the worktop. Kitchen sockets should sit well clear of splash zones, with at least 300 mm of horizontal distance from a sink edge, and any new circuit work in a kitchen is usually notifiable under Part P, meaning it should go through a registered competent person rather than a casual DIY job.
Lighting does more work than people expect. Task lighting tucked beneath a shelf lights the exact spot where you grind and pour, while a warmer ambient bulb nearby makes the whole corner feel inviting rather than clinical, a combination designers recommend specifically for coffee nooks that sit away from the main kitchen lighting.
Pro Tip: Fit a battery-powered or plug-in LED strip under the shelf above your machine; it costs little and transforms how the station looks and works after dark.
Equipment essentials: matching your machine to your routine and your counter
The right machine depends more on your habits and your counter space than on any single “best” option. A compact espresso machine suits anyone making one or two espresso-based drinks a day on a narrow worktop. Pod or capsule machines suit speed and minimal mess, with a small footprint and almost no learning curve. Filter and pour-over setups suit people who want control over strength and enjoy the slower ritual, and need little more than a kettle, a dripper and a scale. Manual lever or stovetop espresso makers suit enthusiasts with more counter depth and patience for technique.
Whatever you choose, a few accessories round out almost every setup:
- A grinder, or good-quality pre-ground beans if space or budget is tight.
- A kettle, ideally one with a narrow spout if you pour over.
- A set of kitchen scales for consistent measuring.
- A milk jug or steaming pitcher if you make milk-based drinks.
- A tamper and a knock box or small grounds bin.
- A tray to contain spills and group the smaller items.
Compact counter machines and pod machines fit tight worktops best, since they need little clearance and no separate grinder footprint. Larger semi-automatic machines reward a deeper nook, since they need room for a grinder alongside and a bit more clearance for steam and noise.
If you are starting from nothing, buy in this order: a machine suited to your drink of choice, a kettle or jug, scales, then a tray to bring it all together.
Storage and organisation: keep beans, cups and tools within reach
Organising a coffee station around three small zones, grind, brew and serve, speeds up the morning routine and keeps the surface tidy. Beans, grinder and scales sit in the grind zone. The machine, kettle and filters sit in the brew zone. Cups, spoons and sugar sit in the serve zone, ideally closest to where you stand to drink.
A shallow drawer works well for loose tools and pods, while an appliance garage or a cupboard with a roller door hides a machine between uses without adding a step to your routine. Under-shelf hooks hold mugs without using surface space, and a small basket corrals pods or sachets that would otherwise scatter.
- Store beans in an airtight ceramic jar such as our ceramic tea, coffee & sugar jars to keep them fresh and off the counter.
- Label jars and canisters if you keep more than one type of bean or tea on the same shelf.
- Display your favourite mugs on open shelving and keep spares in a cupboard, rather than crowding every cup onto the counter.
- Use a storage basket for pods, sachets or spare filters so loose items never end up loose on the surface.
Pro Tip: Keep only what you use daily on the open shelf; everything else belongs behind a door or in a drawer.
Styling and finishing touches that make the corner feel intentional
A coffee station reads as curated rather than cluttered when a few simple rules hold it together. Layered lighting, a single tray to group the machine and its accessories, and two or three well-chosen cups on display all do more than a counter full of loose items ever will.
- Group your machine, jar and a small plant or framed print on one tray so the eye reads them as a single vignette rather than scattered objects.
- Pair a textural material, such as bamboo or woven fibre, with the harder ceramic and metal surfaces already on most machines and jars.
- Choose colours that sit close to your existing worktop and cabinetry rather than introducing a competing palette.
- Keep one or two items on display and store the rest, so the station still looks ready even on a busy morning.
A bamboo rug placed beneath a freestanding station helps define the area underfoot and protects flooring from drips, while a runner or small mat does the same job on a worktop. For more styling ideas, our piece on kitchen countertop decor covers warm, tactile vignettes that work well around a coffee corner specifically.
Cristiano and Homable: expertise behind this guide
This guide draws on practical layout principles used across kitchen design and home styling, written by Cristiano for readers planning their own coffee corner. We offer a range of home decor and household accessories, with features like secure checkout and free shipping on orders over a certain amount, which makes finishing a coffee station straightforward once the layout and equipment are sorted.
Cleaning and maintenance tips for coffee station equipment and surfaces
A coffee station stays pleasant to use, and keeps working properly, only with regular cleaning built into the routine rather than left until something tastes off. Wipe the machine’s drip tray and steam wand daily if you use milk, since dried milk residue is one of the most common causes of blocked steam wands.
Descale according to your machine’s manual, typically every four to eight weeks depending on your local water hardness, using a proper descaling solution rather than improvised substitutes. Empty and rinse the knock box or grounds bin daily, since damp coffee grounds left in a closed drawer encourage mould far faster than most people expect.
Wipe down the worktop surface itself at the end of each day, paying attention to the area directly under the grinder where fine coffee dust settles. A ceramic jar with a tight seal is easier to wipe clean than an open canister, and it keeps stray grounds away from the lid’s rim.
Give the whole station a deeper clean weekly: empty and wash any removable parts, check hoses and seals on machines that use water reservoirs, and dry everything fully before reassembling, since trapped moisture inside a closed appliance garage can encourage damp smells over time.

Ergonomic considerations to reduce clutter and effort
A well-placed coffee station reduces the number of movements between waking up and holding your first cup. Position the machine at a height where you can see into the water reservoir or portafilter without stooping, generally somewhere between standard worktop height and eye level on a shelf above it.
Keep the items you touch every single day, the machine, your everyday mug, and the beans or pods, within a single step of each other. Anything used weekly rather than daily, such as spare filters or a second grinder burr set, can live a shelf or drawer further away without adding friction to the morning routine.
Avoid stacking frequently used items behind decorative ones. A pretty display loses its charm quickly if you have to move three ornaments to reach the tamper every morning. The goal is a station where the most-used tools are the most accessible ones, with decor filling the gaps rather than blocking the workflow.
Sustainability: eco-friendly choices and waste management for your station
A coffee station is an easy place to build in better habits, from the materials you choose to how you deal with spent grounds. Organic cotton tea towels, such as those in our tea towels range, cut down on paper towel waste for daily wiping and spills.
Spent coffee grounds compost well and also work as a mild abrasive for cleaning stubborn kitchen residue, so a small lidded container beside the knock box gives you somewhere to collect them before they go into a compost bin or garden bed. Reusable metal or cloth filters cut down on paper filter waste for pour-over setups, and refillable pod systems reduce single-use capsule waste for anyone using a pod machine.
Choosing durable, repairable equipment over the cheapest disposable option also counts as a sustainability decision, since a machine or grinder that lasts a decade produces far less waste over its lifetime than three short-lived replacements. The same logic applies to decor: a solid ceramic jar or a natural-fibre rug outlasts plastic alternatives and ages better alongside the rest of your kitchen.
A single realistic starter setup worth copying
For most homeowners, a pod machine or a compact espresso machine, a small grinder or pre-ground beans, one tray, two shelves, an airtight canister, and a single under-shelf light covers the whole routine. Add a second machine or a grinder upgrade later, once you know your habits.
— Cristiano
Finishing touches from our collection
Once the layout and equipment are settled, a handful of styling pieces turn a working corner into one that looks intentional every morning. Measure your shelf and surface space before buying anything, and remember that orders over £100 on Homable ship free, with secure checkout at every step.

- Keep beans fresh and visible in our ceramic tea, coffee & sugar jars.
- Define the floor beneath a freestanding station with a natural bamboo rug.
- Wipe spills sustainably with organic cotton tea towels.
- Browse our full kitchen collection for trays, shelves and small storage pieces.
If you want a ready-made gift idea to pair with a new coffee corner, a coffee gift set from our partners at Sayhey Gifting makes a fitting addition for someone setting theirs up for the first time.
FAQ
How can I set up a coffee bar at home?
Choose a spot near an existing power socket, clear a dedicated surface, add a machine suited to your routine, and store beans, cups and tools in a small area around it. Follow the coffee maker triangle of power, water and storage to keep the layout efficient from day one.
What is the 80/20 rule for coffee?
Definitions vary depending on who you ask, and this is not a rule covered by the sources used for this guide. Rather than relying on an unverified ratio, focus on consistent measuring with a scale and a grinder suited to your chosen brew method.
How much money do I need to start a coffee shop?
This guide covers home coffee stations rather than commercial coffee shop setup, so start up costs for a business are outside its scope. For a home station, costs range from a simple pod machine and a few accessories to a larger semi-automatic setup with a dedicated grinder.
How do I set up a coffee machine?
Place the machine on a stable, level surface near a socket, fill the water reservoir, and run a cleaning or priming cycle if the manufacturer’s instructions call for one before first use. Keep the machine at least 300 mm from any sink edge, in line with kitchen electrical guidance on splash clearance near sockets.
Do I need plumbing for a home coffee station?
No, a plumbed water line is optional rather than essential for most home setups. If plumbing is not practical, a small dedicated milk fridge and a simple refill routine for the water reservoir work well, as idea galleries commonly suggest for stations away from the sink.
Sources
- The best coffee station layout for a barista-level routine | Livingetc
- Kitchen electrical regulations: circuits | Elec-Mate
- 40 beautiful coffee bar ideas for the perfect morning routine