Cart
0
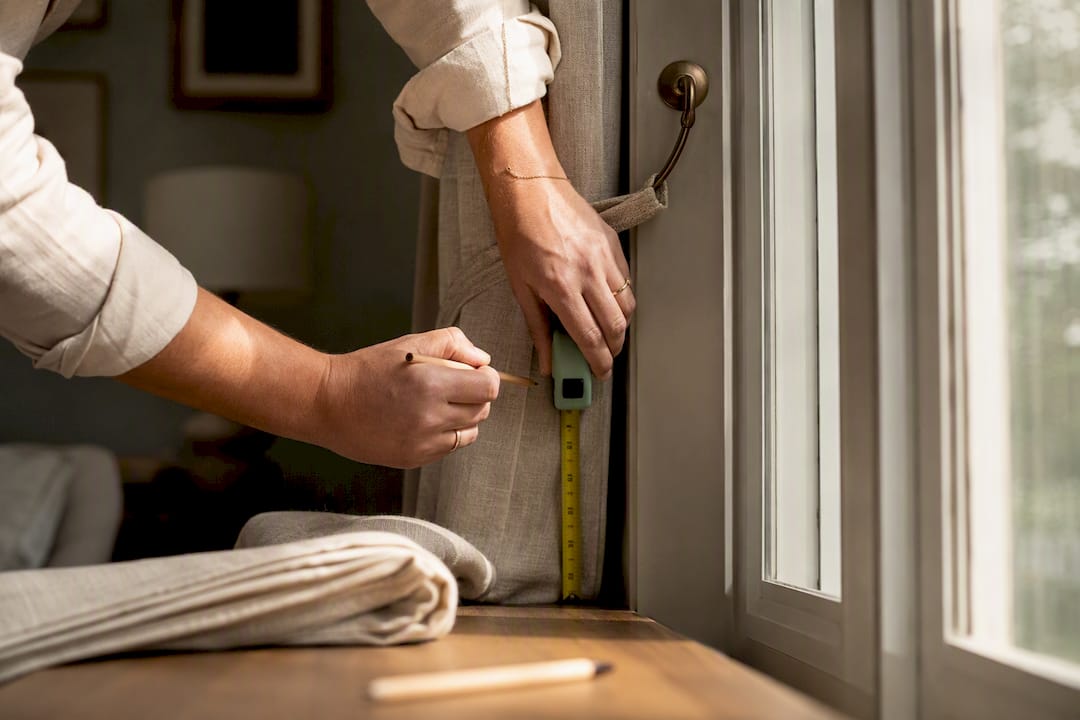
Fit tiebacks at one-third of the way up the curtain, measured from the bottom hem, and set them 2–4 inches (5–10cm) outside the outer edge of the window frame. That single combination sorts height and depth for most floor-length curtains. Café panels and heavy, lined fabric are the exceptions worth knowing before you pick up a drill.
TL;DR:
- The standard tieback height is one-third of the curtain drop, typically around 28 to 32 inches for an 84-inch panel, creating a balanced look.
- Place tiebacks 2 to 4 inches outside the window frame edge to maximize daylight and prevent fabric from pressing against cold glass.
- Measure from the floor for both sides and use a level to ensure horizontal alignment before drilling to avoid uneven placement.
- Heavier curtains or high ceilings may require positioning tiebacks slightly higher or lower than the standard rule for optimal aesthetics and tension reduction.
- Alternative fixings like magnetic or fabric tiebacks work well if hardware ratings are matched to curtain weight, and adjustments beyond the one-third rule can suit specific window shapes or design preferences.
Table of Contents
- Where should curtain tieback height sit on the panel?
- How do you measure and mark both sides so they match?
- What anchors and fixings do you need for a secure fit?
- Should you adjust placement for heavier fabric or a different room?
- What are the best tieback styles for different curtain types?
- How do you fix uneven or crushed curtain tiebacks?
- Where can you find more measuring help and guidance?
- How does natural light and window shape change tieback position?
- Are there alternatives to a standard hook tieback?
- When should you deliberately break the one-third rule?
- How Homable can help with tieback hardware and measuring
- Sources
Where should curtain tieback height sit on the panel?
The one-third rule sounds fussy until you see it in a room. Measure the full drop of the curtain from the bottom hem, then mark a point one-third of the way up from that hem. For a standard 84-inch panel, that lands around 28 to 32 inches from the floor, which is roughly the same height as a door handle. Some people find it easier to think of it the other way round: two-thirds of the fabric hangs above the tieback, one-third billows below it. Both descriptions point to the same mark, so use whichever helps you measure without second-guessing yourself.
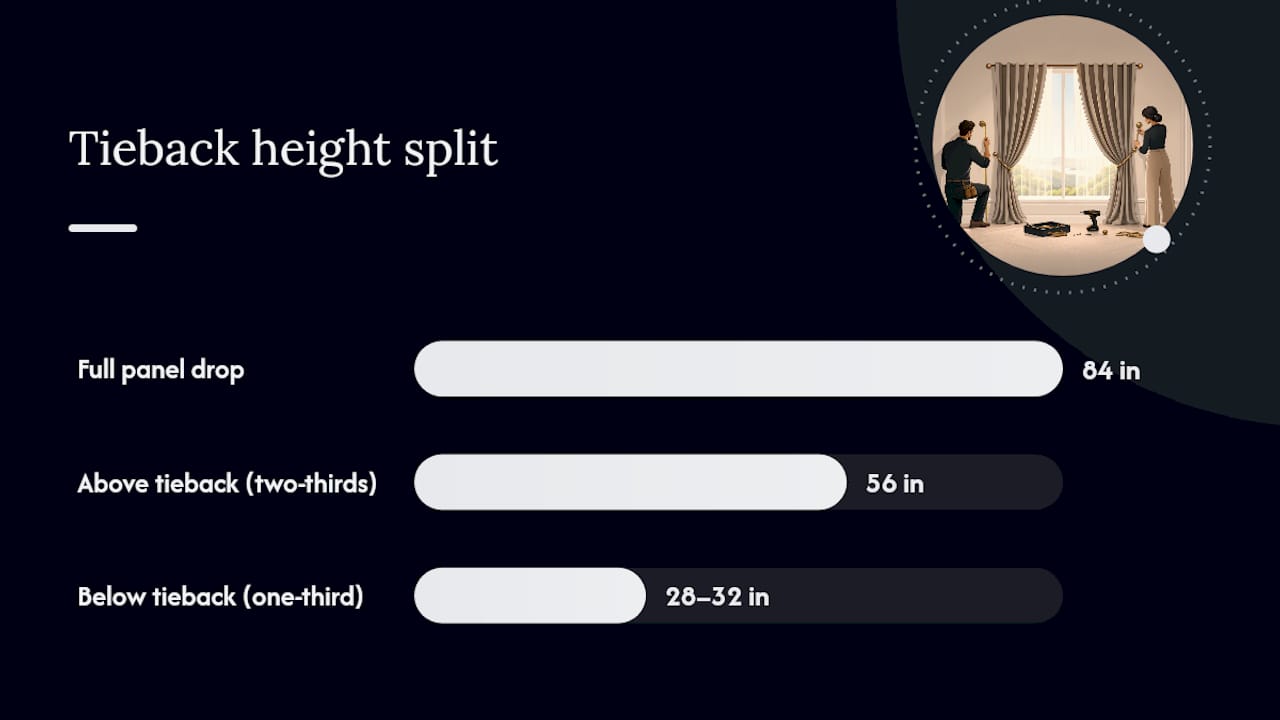
That proportion isn’t arbitrary. It creates a visual split that reads as balanced from across the room, avoiding the bunched, top-heavy look you get when a tieback sits too high, or the awkward pooling you get when it sits too low.
Here’s how that plays out across common panel lengths:
Horizontal placement matters just as much as height. Set the tieback or holdback 2 to 4 inches outside the outer edge of the window frame, never on the frame itself. That gap does three jobs at once: it lets more daylight into the room when the curtain is open, it gives the fabric room to sweep back cleanly instead of folding awkwardly against the wall, and it stops the gathered fabric pressing against cold glass, which over time can mark lighter fabrics.
A few things push you off that default:
- Café or sill-length curtains don’t follow the one-third rule at all. On a panel around 36 inches, use the halfway point instead, or the gathered fabric crowds the hem and looks squashed.
- High ceilings and long drops tend to look better with the tieback nudged slightly higher than one-third, since the extra fabric above the mark reads as generous rather than heavy.
- Café-style or short kitchen panels benefit from a lower, tighter gather since there’s simply less fabric to play with.
- Pencil-pleat and eyelet curtains often sit slightly differently to pinch pleat, since the fullness gathers at a different point along the drop.
How do you measure and mark both sides so they match?
Uneven tiebacks are the single most noticeable mistake in a finished room, and they’re entirely avoidable with a proper measuring method. Here’s the sequence that gets both sides matching first time.
- Measure the curtain drop. Take the full length from rod to hem, then divide by three, or check the chart above for your panel length.
- Measure from the floor, not the rod. Mark your first tieback point by measuring up from the floor rather than down from the curtain pole. Rods and tracks are rarely perfectly level with the floor, and measuring from the floor removes that variable entirely.
- Transfer the exact measurement to the other side. Use the same floor-to-mark distance on the opposite curtain. Don’t eyeball it.
- Check level across the window. Hold a spirit level or a long straightedge between both marks. If the window itself isn’t quite square (plenty of older houses aren’t), trust the level over the frame.
- Find the frame’s outer edge. This sets your horizontal offset. Measure out 2 to 4 inches from that edge and mark the fixing point.
- Gather your tools before you start. Tape measure, pencil, spirit level, drill, wall anchors suited to your wall type, and screws long enough to bite into solid material behind the plaster.
Pro Tip: Mark both sides in pencil first and stand back to check them from across the room before committing to a drill. A mark that looks fine up close can look noticeably off from a normal viewing distance, and pencil rubs out far more easily than a filled screw hole.
Small horizontal tweaks, shifting a hook forward or back by just 1 to 2cm, often fix a leading edge that looks slightly crooked without needing to redo the whole measurement.
What anchors and fixings do you need for a secure fit?
The right hardware depends entirely on your wall and your curtain weight, and getting this wrong is how tiebacks end up pulling out of plaster within a year.
- Lightweight cotton or voile curtains on plasterboard usually hold fine with standard plastic wall anchors and a single screw.
- Heavy, lined, or interlined curtains need more than a plastic anchor can offer. Toggle anchors or coach screws driven into a stud give a far more secure fixing for real weight.
- Single-hook tiebacks need one solid pilot hole and a screw long enough to reach at least 25mm into solid material behind any plaster skim.
- Two-screw holdback arms spread the load across two fixing points, which suits heavier fabric better than a single hook ever will.
- Projection from the wall should sit around 1 to 2 inches (2.5 to 5cm), enough for the fabric to clear the glass without the holdback looking like it’s floating away from the window.
Before drilling, check for hidden pipework or cabling, particularly near sockets or radiators, and try to locate a stud if you’re fixing into plasterboard. Once fitted, test the fixing under load and make sure the backplate sits flush and doesn’t rotate when you pull the curtain into it. If it moves at all under normal handling, it will fail eventually. For the wider job of fitting poles, tracks, and brackets around the tieback itself, Homable’s curtain installation workflow walks through the sequence in more detail.
Should you adjust placement for heavier fabric or a different room?
The one-third rule is a starting point, not a rule you need to follow to the millimetre. Room proportions and fabric weight both give you good reasons to shift it.
- Tall rooms with high ceilings often look better with the tieback raised slightly toward the halfway mark, since it opens up a more formal, generous sweep rather than a tight gather.
- Standard ceiling heights usually suit the classic one-third position without any adjustment needed.
- Heavy or lined curtains put real strain on the gathered fold, so consider mounting the holdback 2 to 3 inches lower than the standard one-third point to ease that tension, and use rigid hardware rather than a soft fabric tieback.
- Pinch pleat and goblet pleat curtains hold their shape well at the standard height, while looser gathers on tab-top or eyelet styles sometimes look better with a slightly lower tieback to control the extra fullness.
Small shifts do most of the work here. A vertical adjustment of just 1 to 2 inches is usually enough to fix a curtain that looks slightly wrong, so there’s rarely a need to redrill from scratch. Stand back from the window, look at the fold, and adjust from what you actually see rather than sticking rigidly to a measurement that doesn’t quite suit that particular fabric.
What are the best tieback styles for different curtain types?
A few styling choices change where and how you fit the hardware, not just what it looks like.
- Tassel tiebacks need one extra check: make sure the tassel doesn’t hang below the curtain hem once it’s looped and tied. If it does, nudge the hook slightly forward or back to shorten the visible drop of the rope.
- Stacked tiebacks on very tall, floor-to-ceiling panels work well when set as a pair rather than a single point. Position the upper tieback roughly 15cm above the lower one so the two folds read as deliberate, not accidental.
- Very wide panels often look better with two tiebacks rather than one central gather, which avoids an overloaded bunch in the middle of the fabric.
- Final adjustments come down to fanning the folds evenly by hand once the tieback is fitted. The last centimetre or two of fine-tuning is genuinely a matter of eye, not measurement.
How do you fix uneven or crushed curtain tiebacks?
Most placement problems are quick fixes rather than reasons to start again.
- Uneven heights across the window: recheck both marks with a spirit level rather than trusting the eye, then adjust the lower fixing to match.
- Fabric bunching or crushing at the tieback: move the hook outward by 1 to 2cm, or lower it slightly to release some of the pinched tension.
- Sagging under a heavy curtain: re-anchor into a stud, upgrade to a toggle fixing, or switch to a rigid holdback arm instead of a soft fabric loop.
- Still looks off once fitted: step back to normal viewing distance before making any further changes. Problems that look obvious up close often disappear entirely from across the room.
Where can you find more measuring help and guidance?
Getting the drop right before you even think about tieback height makes everything downstream easier. Homable’s curtain size guide covers how to measure panel length and pole width accurately, which is the figure the entire one-third calculation depends on. If you’re fitting new poles, tracks, or brackets alongside the tiebacks, the installation workflow guide runs through bracket spacing and wall fixings in the same practical, step-by-step format used throughout this piece. Between the two, you’ve got the measurements and the mounting logic covered without needing to piece it together from separate sources.
How does natural light and window shape change tieback position?
Bay windows, sash windows, and windows with a strong view all change the calculation slightly. A tieback set at the standard height on a sash window still works, but pulling it fractionally higher on a window with a good outlook, a garden or a skyline, opens up more of that view during the day. Bay windows often need tiebacks set slightly further from the frame than the standard 2 to 4 inches, since the angled glass can bring fabric closer to the pane than a flat window would. Rooms that get strong afternoon sun sometimes benefit from a slightly wider horizontal offset too, since it lets the curtain sit further back and reduces direct fabric contact with hot glass. None of this overturns the core rule. It just means the rule bends toward whichever result lets more light in or frames the view better, which is really the point of a tieback in the first place.

Are there alternatives to a standard hook tieback?
Fixed hooks aren’t the only option, and some rooms suit an alternative better.
- Magnetic tiebacks clip together without any drilling, which suits rented properties or curtains that get repositioned often.
- Fabric or rope bands loop around the curtain and hang from a small hook, giving a softer look than a rigid holdback arm.
- Adjustable bands with hook-and-loop fastening let you fine-tune the gather width without remeasuring, useful if you like to change the look seasonally.
- Wall hooks without a full holdback arm work well for lightweight curtains where a decorative knot or twist replaces a formal tieback shape entirely.
Whichever method you choose, the same one-third height and horizontal offset still apply as your starting point.
When should you deliberately break the one-third rule?
The one-third rule works because it looks balanced from a normal viewing distance, not because it’s a fixed law. On a sash window with a genuinely good view, or where you want more daylight than a mid-height tieback allows, raising the fixing toward halfway often works better. Trust what you see from across the room over the tape measure.
— Cristiano
How Homable can help with tieback hardware and measuring
Getting the hook or arm right matters as much as the measurement itself, and that’s where a lot of tieback jobs actually go wrong: the wrong hardware for the wrong fabric weight. There are tieback hardware and curtain accessories designed to work with the placement techniques covered here, alongside measuring guides that get your panel drop right before you ever pick up a drill.

Before buying, check the projection and weight rating on any holdback against your curtain type. A single hook rated for voile won’t hold lined velvet, no matter how well it’s anchored into the wall. If you want fitting inspiration alongside the hardware, The Perfect Stitch’s gallery shows a range of finished window dressings worth browsing for ideas. When you’re ready to shop tieback hardware and coordinating accessories, head to Homable and use the curtain size guide first to confirm your panel drop, so the piece you order matches the placement you’ve just marked out.
Sources
- How high should curtain tiebacks and holdbacks be?
- Curtain Holdback Placement: Height and Distance Guide
- Where to Position Your Curtain Tieback Hooks?