
Cart
0
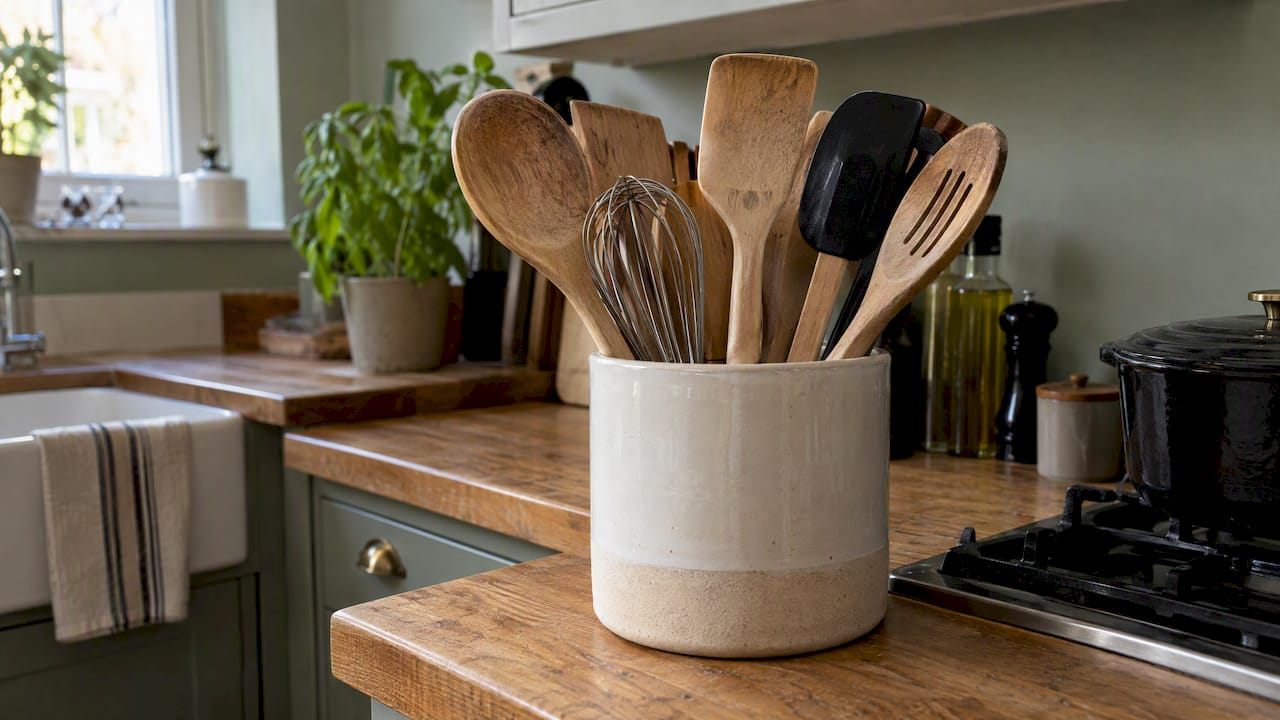
The best utensil holder is the one that keeps the tools you use every day within arm’s reach of the hob, stays upright when you pull out a heavy ladle, and is easy to wipe clean. Beyond that, you can choose between a classic ceramic crock, a wall rail, a repurposed jug or a hybrid of all three. This guide walks through the ideas that work in real kitchens, how to pick the right size and material, and the mistakes that turn a pretty holder into a nuisance.
TL;DR
- A crock about 5 to 6 inches across holds roughly 10 to 12 standard utensils, according to this kitchen design guide. Go wider if you cook a lot.
- Weight and base width matter more than looks: a light, narrow holder tips the moment you pull out one spatula.
- Keep holders well away from the hob and make sure utensils are dry before they go in.
- The most efficient set-up is usually a hybrid: a crock for daily tools, a wall rail or hooks for the rest.
- Only keep what you reach for weekly. A holder full of gadgets you never use is clutter in a nicer pot.
Table of Contents
- Start with what you actually cook with
- Countertop utensil holder ideas that look good
- Utensil holder ideas you can make or find at home
- Getting the size and stability right
- Wall-mounted and drawer-free ideas
- Where to put it, and how to keep it clean
- Styling the holder as part of the worktop
- Our view on utensil storage
- Finishing the look with Homable
- A simple way to choose
- FAQ
- Sources
Start with what you actually cook with
Before you buy anything, pull out every utensil you own and sort them into three piles: used most days, used now and then, and never used. Only the first pile belongs on the worktop.
This is the principle behind open storage. A Wirecutter piece on organising a tiny kitchen quotes the expert’s view that the harder tools are to see, the less you use them. Open holders and rails work because they keep tools visible. They only work if you declutter first, and the same advice suggests holding to things you reach for at least once a week.
For most households the daily pile looks like this:
- a wooden spoon or two
- a spatula or fish slice
- a ladle
- a whisk
- tongs
- a slotted spoon
That is six to eight items. It tells you straight away that you do not need a vast crock, and that a very narrow vase will be tight.
Countertop utensil holder ideas that look good
A countertop holder is usually called a utensil crock or a caddy. These are the styles worth considering.
1. The ceramic or stoneware crock
The traditional choice, and for good reason. Ceramic and stoneware are heavy, so they stay put, and they come in every colour from cream to deep green. A glazed interior wipes clean easily. The downside is that they can chip, and a glazed crock dropped on a tile floor rarely survives.
2. Stainless steel
A brushed steel holder suits modern and industrial kitchens and tolerates knocks. Choose a model with a weighted or wide base, because thin steel can be surprisingly light once you pull out a utensil.
3. Bamboo or wood
Warm and tactile, bamboo and wood soften a kitchen that has a lot of hard surfaces. Be careful with care instructions: wood does not like soaking, and a permanent wooden base on an otherwise ceramic or metal holder is not dishwasher-safe. Water can warp and crack it and encourage mould, a point made in this holder roundup. A holder with a removable silicone insert is easier to keep fresh.
4. Marble or stone
A marble holder is substantial, which means it will not tip, and it looks smart next to a bread bin or coffee machine. It is also heavy to lift when you want to wipe under it.
5. Acrylic or glass
Clear holders suit a minimalist look and let you see how many tools are inside. Glass shows every smear, so expect to polish it.
6. Multi-compartment caddies
If small tools such as peelers, small whisks and measuring spoons get lost at the bottom of a crock, a divided holder sorts them by type. Dividers also add stability, which helps if you own heavy metal tools.
7. A drying-style holder
If your forks and spoons live in a soggy cup beside the sink, a holder that drains into the sink or a small tray can make sense. That is a different job from a crock for cooking tools, so treat it as an extra rather than a replacement.
For a sense of what these cost, one design guide puts common countertop models at roughly £5 to £45, with budget options often between £5 and £15 and premium crocks reaching £45 or more. Treat that as a guide, as prices move with brand and material.
Utensil holder ideas you can make or find at home
You do not have to buy a purpose-made holder. Plenty of household items do the job, and a repurposed piece can give the kitchen more personality than anything off the shelf. The usual suspects, mentioned across kitchen design guides, include:
8. A vase or pitcher
A tall ceramic jug or a wide-necked vase works well. Pick one with a base wide enough to stay upright, and avoid anything with a narrow neck that makes it hard to pull tools out.
9. A flower pot
A glazed plant pot is cheap and comes in plenty of colours. Check it has no drainage hole, or seal it, so you are not left with a dripping base. A clean, unglazed terracotta pot can absorb moisture and is harder to keep hygienic, so a glazed interior is the sensible choice.
10. A vintage tin or enamel jug
Repurposed tins and enamel jugs are a popular route, and this roundup of 21 styles lists vintage tins and ceramic pitchers among them. Check the inside has no rough seam or rust where it could catch a utensil or trap moisture.
11. An ice bucket or coffee canister
A metal ice bucket gives you a wide, stable base for a large collection. A clean coffee canister works for a smaller set.
12. A pegboard or hooks
A small pegboard turns a blank bit of wall into storage and frees up worktop space entirely. Hooks under a wall cabinet do a similar job if you are short of wall.
Getting the size and stability right
This is where most people go wrong. A narrow container can look neat when empty, then become unstable once filled with heavy metal tools. That is the warning from the experts quoted on a retailer’s countertop storage page, who suggest choosing a wider base or a model with internal dividers.
Some practical rules:
- Match the diameter to your collection. A 5 to 6 inch (about 13 to 15cm) diameter typically holds 10 to 12 standard utensils, while larger models take up to 20, per the design guide above.
- Test the balance before you commit. Put your heaviest utensil in the empty holder on its own, then add the rest. If it tips with the ladle alone, it will tip in daily use.
- Weight the base if needed. If you love a holder that is too light, the same guide suggests lining the bottom with a clean folded dish towel or a layer of weighted material such as food-grade pebbles. Keep the weight clean and dry, and check it regularly.
- Mind the height. Tools should stick out by about a third so you can grab them, but a tall whisk in a short pot will knock it over.
Wall-mounted and drawer-free ideas
If your worktop is already full, go vertical. A guide to storing utensils without drawers points to magnetic strips, pegboards, under-cabinet hooks, pull-out organisers for tight spaces and rolling carts as the main alternatives to a crock.
13. A wall rail with hooks
A stainless steel or wooden rail with S-hooks keeps ladles, whisks and tongs on show. It sits best beside the hob, but not above it (more on that below).

14. A magnetic strip
Good for knives and metal tools. Mount it out of reach of children, and keep knives with the blade protected from drips.
15. An inside-cupboard organiser
If you prefer a clear worktop, Homes & Gardens suggests borrowing drawer-style organisers to line a cabinet shelf or pantry. You lose the visibility benefit, so keep it for the tools you use least.
The hybrid approach
The same drawer-free guide says a hybrid system is often cited as the most efficient: a crock for daily tools near the prep area, and drawers or hooks for the specialist ones. It claims this can cut movement around the kitchen and improve efficiency by as much as 30%. That figure is the guide’s own claim rather than a measured study, so take it as direction rather than a promise. The principle is sound though: keep the things you use constantly closest.

Where to put it, and how to keep it clean
Keep it away from the hob
The obvious spot beside the cooker is not always the best. Stir-frying aerosolises oil, which settles on whatever is nearby, and a discussion on storing utensils above the hob covers the grease and splatter that collect on tools hung there. That oily film also traps dust. A sensible rule is to leave a gap of at least 30 to 50cm from the heat source, which also avoids melted plastic handles. Put the holder to one side of the prep area, within a step or two of the hob, rather than directly over or beside the burners.
Dry before you store
Always put utensils away clean and fully dry. Trapped moisture at the bottom of a holder is where grime and bacteria build up. Choose a holder you can wipe clean or put in the dishwasher, and empty and wash it every few weeks. A holder that stays damp also invites trouble beyond hygiene, so if crumbs and spills are common around your worktop, take a look at how to keep pests away from your kitchen as well. That guide comes from Singapore, so its pest species and treatment services will differ from what you would find in the UK, but the housekeeping habits are universal.
Separate raw and ready-to-eat tools
There is no legal rule for the storage vessel itself, but the food hygiene principle is to prevent cross-contamination. A West Lothian Council kitchen leaflet makes the point that equipment used for raw food should be kept apart from equipment for ready-to-eat food. At home, the simplest way to do this is to wash tongs or spatulas used on raw meat before they go back in the crock, and never reuse them on cooked food without washing. If you cook a lot of raw meat, a second small holder or a hook for raw-food tools is a cheap habit.
Styling the holder as part of the worktop
A holder sits in the most visible part of the kitchen, so it is worth treating it as decor as well as storage. A few approaches that tend to work:
- Repeat a material. A bamboo holder next to a wooden chopping board and a bamboo roller blind ties the room together.
- Pair it with a tray. Group the holder, an oil bottle and a salt pot on a small tray so the worktop looks arranged, not scattered.
- Use texture. A speckled stoneware crock against a plain splashback adds interest without competing with it.
- Add a soft touch. A folded tea towel beside the holder breaks up hard surfaces and is within reach when you need it.
If you want more on styling worktops, our guide to kitchen countertop decor covers warm, tactile arrangements, and our piece on stylish storage solutions has ideas for the rest of the house.
Our view on utensil storage
We spend our days looking at how people style and organise their homes, and one pattern keeps showing up: kitchens feel calmer when every visible object has a job. A utensil holder is a good test. If it looks good but tips over, it fails. If it works but is ugly, you will stop looking after it.
Our advice is to choose function first, then shop for looks within that. Decide how many tools you really use. Pick a base that is wider than you think you need. Then choose a material that matches the rest of your worktop. A natural texture such as bamboo, wood or stoneware generally ages better than a trend colour.
We also think the holder should not work alone. A crock for daily tools, a rail or hooks for the rest, and a tidy shelf for the things you only use at weekends gives you a kitchen that stays organised without effort. Revisit the set-up every few months: professional organisers quoted in the drawer-free storage guide recommend re-evaluating storage every three to six months as your cooking habits change.
— Cristiano
Finishing the look with Homable
A good holder is only one part of a worktop that works. At Homable we stock home decor and household accessories, including kitchen mats, tea towels and wall shelves that can sit alongside your utensil storage. You can browse our kitchen collection for pieces that suit the room, or look through the full range on our homepage if you are also refreshing other rooms. Free shipping applies on orders over £100.
For more ways to use space well, see our storage solutions checklist and our ideas for basket storage.
A simple way to choose
If you are still undecided, work through these questions in order:
- How many tools do you use weekly? Under eight, a small crock works. Over twelve, go wide or add a rail.
- How much worktop can you spare? If very little, go to the wall.
- What is the heaviest utensil? Test the holder with that alone.
- Can you wash it easily? If it has a wooden base, check whether it is removable.
- Where will it sit? Close to the prep area, a sensible distance from the hob.
| Style | Best for | Watch out for |
|---|---|---|
| Ceramic or stoneware crock | Heavy daily tools, traditional kitchens | Chips and cracks |
| Stainless steel | Modern kitchens, durability | Light bases tip |
| Bamboo or wood | Warm, natural looks | Water damage to bases |
| Marble or stone | Stability and style | Weight when cleaning |
| Wall rail or pegboard | Small worktops | Needs drilling or fixing |
| Repurposed jug or pot | Budget, character | Narrow necks, drainage holes |
FAQ
What else can you use a utensil holder for?
A holder works well for anything long and thin that is awkward to store flat. Think rolling pins, wooden skewers, cooking chopsticks or even pens and scissors on a desk. In a bathroom it holds toothbrushes or make-up brushes, provided you wash the holder regularly.
What do you call a kitchen utensil holder?
The most common names are utensil crock, utensil caddy and utensil pot. A crock tends to be a larger ceramic or stoneware container, while a caddy often has compartments. Wall-mounted versions are usually called rails or racks.
How big should a utensil holder be?
For most households, a diameter of around 5 to 6 inches suits 10 to 12 standard utensils, and larger holders take up to 20, according to this design guide. Base width matters as much as size, so test it with your heaviest tool first.
How do you stop a utensil holder tipping over?
Choose a heavier material such as stoneware or marble, or a model with a wide base or dividers. If you already own a light one, line the bottom with a clean folded dish towel or a layer of food-grade pebbles, and place the heaviest tool in first to check the balance.
Can you store a utensil holder next to the cooker?
It is better not to put it directly next to or above the hob. Heat can melt plastic handles, and cooking vapours leave an oily film on tools. Keep it a short step away, ideally with a gap of 30 to 50cm from the heat source.
Sources
- Kitchen Utensil Holder Ideas: 21 Unique Styles to Transform Space
- How Our Kitchen Expert Organizes His Tiny Brooklyn Kitchen, Wirecutter
- Countertop Utensil Storage, Sur La Table
- 5 Best Kitchen Utensil Holders: Stylish and Space-Saving
- How to Store Kitchen Utensils Without Drawers
- Where to put utensils in a kitchen without drawers, Homes and Gardens
- Is it safe/sensible to store utensils above the hob?
- Kitchen layout planning leaflet, West Lothian Council
- How To Keep Pests Away From Your Kitchen