Cart
0
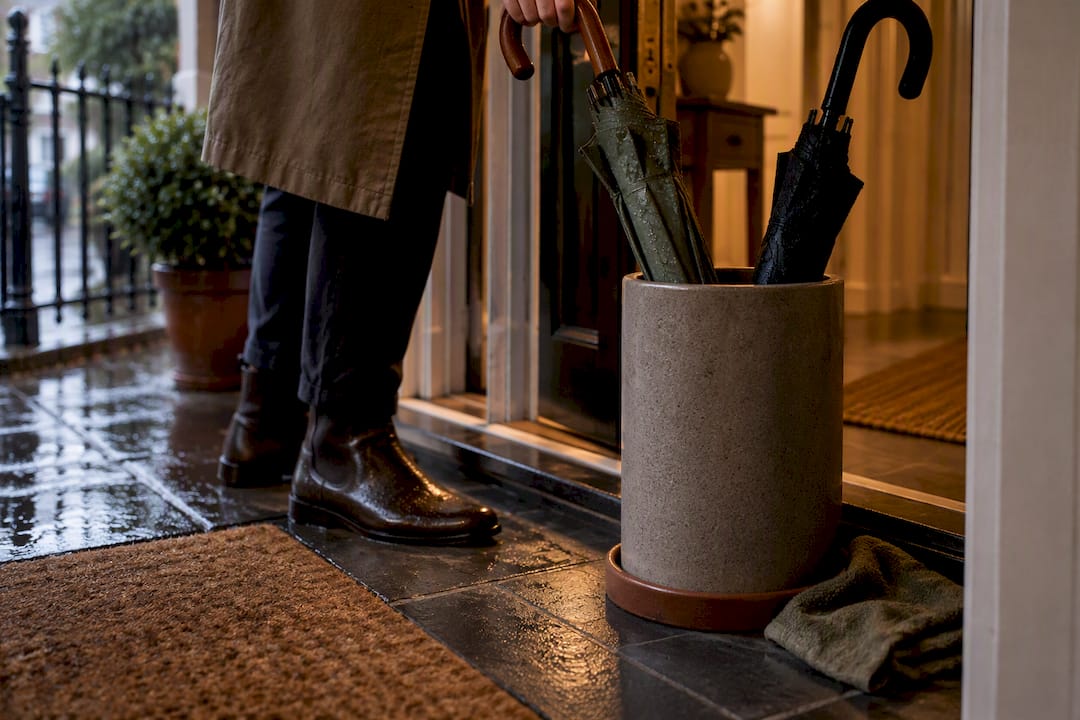
The easiest options are a glazed ceramic stand with a removable liner for a smart hallway, a galvanised metal bucket or repurposed planter for budget or outdoor use, and a lined wicker basket where you want warmth without the mud stains. Wall-mounted holders suit tight entryways. Below you’ll find styled buys, three DIY builds, sizing rules, and how an online retailer’s range and sizing guide fit into all of it.
TL;DR:
- Choosing a stand with a minimum height of 40 to 45cm ensures full-length umbrellas remain upright and don’t tip sideways.
- Removable liners and sealed materials like glazed ceramic or galvanised metal prevent water damage and enable daily use.
- Simple DIY options, such as lining a vessel with a plastic liner and adding pebbles, cost less than £15 and take under an hour to assemble.
- Outdoor umbrella bases must be at least 15kg and filled with sand or gravel to withstand wind, and should be placed away from walking paths.
- Proper maintenance includes emptying and drying drip trays regularly, checking seals annually, and re-sealing wood every one to two years.
Table of Contents
- Stylish umbrella stand ideas you can buy or repurpose today
- How do you build your own umbrella stand?
- Which materials and finishes actually last outdoors and in?
- What size umbrella stand do you actually need?
- A note on how these ideas were put together
- What actually matters here (and what doesn’t)
- Shop the look: Homable’s entryway range
- Sources
- FAQ
Stylish umbrella stand ideas you can buy or repurpose today
Most decorative umbrella storage falls into a handful of proven categories, and the right one depends on where it’s going and how many wet umbrellas it needs to swallow on a rainy Tuesday.
A tall glazed ceramic stand with a removable drip tray remains the most practical upgrade for a hallway that sees regular rain, because the glaze stops water soaking in and the tray lifts out for emptying and cleaning. Look for a tall stand with a diameter wide enough to remain stable when holding multiple long umbrellas, as narrower ones tend to tip over.
- Ceramic stands: glazed finish, wide base, removable tray. Best for hallways that double as the main entrance.
- Galvanised metal buckets or planters: cheap, rust-resistant, and equally happy indoors or on a covered porch.
- Wicker or seagrass baskets: warm and textural, but only sensible with a plastic liner dropped inside.
- Metal mesh or wire stands: the open sides speed up drying and cut down on that musty smell you get with enclosed designs, according to House Beautiful’s roundup of hallway storage.
- Wall-mounted or slim corner holders: the only sensible answer for a hallway under a metre wide.
- Vintage churns, umbrella-shop antiques, or old coal buckets: characterful, but check the base for rust and add a liner before use.
None of these need to cost much. A junk-shop find with a £4 rubber liner from a hardware shop often beats a mass-produced stand for character, and it’s the approach several creative DIY roundups lean on when budget is tight.
How do you build your own umbrella stand?
You don’t need a workshop full of tools to make a stand that works better than most shop-bought versions. Three levels of project cover most skill levels and most spaces.

Easy: the glass vase or lined basket conversion
This takes under an hour and costs next to nothing if you already own a tall vase, urn, or basket.
- Choose a vessel at least 40cm tall with a stable, wide base.
- If it’s a basket, line the interior with a cut-to-fit plastic tub or a bin liner folded down.
- Add a layer of decorative pebbles or marbles in the bottom, roughly 5cm deep, both for weight and to stop umbrella tips scratching the base.
- Set the vessel in its final spot before loading it, since a full stand is heavy and awkward to shift.
- Wipe out the liner weekly if it’s getting regular use.
Cost: under £15 if you’re buying the pebbles and liner new.
Intermediate: a wooden slatted stand
A slatted timber stand looks sharp in a modern or Scandinavian hallway, and the build is well within reach of anyone comfortable with a saw and a drill.
- Cut four legs and a series of slats to form an open box roughly 20cm square and 35cm tall.
- Sand every internal face smooth, this matters more than people expect.
- Seal the interior wood with a waterproof varnish or marine-grade sealant before assembly, since DIY builds consistently warn that water sitting against untreated timber is what actually ruins these stands.
- Let the finish cure fully before you screw or glue the frame together.
- Assemble the box and fix a base panel.
- Drop in a removable metal or plastic drip dish cut to fit the internal footprint.
- Add rubber feet underneath to protect flooring and stop slipping.
Pro Tip: Finish the wood before assembly, not after. Once the frame is screwed together, brushing sealant into tight internal corners is nearly impossible, and that’s exactly where water pools.
Robust: a weighted planter base for outdoor parasols
Outdoor umbrella and parasol stands are a different job entirely, because wind turns an unweighted stand into a hazard.
- Choose a sturdy planter or purpose-built cross-base, minimum 15kg empty weight.
- Fill with sand, gravel, or a concrete mix for permanent installations.
- Bolt an adaptor plate to the base if you’re using a purpose-built parasol stand.
- Test the pole fit before the fill sets, adjustments after are a nightmare.
- Collapse the parasol whenever wind hits roughly 25mph (40kph), the threshold Bolton Council’s own base-build guidance uses for stability.
Which materials and finishes actually last outdoors and in?
Not every material copes with wet umbrellas dripping into it day after day, and the wrong choice shows up as warped wood or a rusted rim within a season.
Glazed ceramic, galvanised metal, and plastic-lined designs handle water the best of any category, largely because none of them absorb moisture the way raw timber or unlined natural fibre does. Wood needs sealant applied to every internal face, ideally before the piece is assembled, paired with a removable drip dish so water never actually touches the timber. Woven baskets need a PE or rubber liner if they’re going anywhere near wet umbrellas, and a few small ventilation holes in that liner cut down on trapped odour.
- Empty and dry the drip tray after heavy use, not just when it overflows.
- Leave umbrellas open to dry fully before storing them closed whenever you can.
- Check seals, glazes, and liners annually for cracks or wear.
- Re-seal exposed wood every one to two years depending on how much use the stand gets.
Removable liners are the single easiest upgrade you can make to any decorative stand, turning a purely ornamental piece into something that copes with daily use without a second thought.
What size umbrella stand do you actually need?
Height matters more than most people assume when they’re buying online. A stand under 35cm tall will let a long golf umbrella tip sideways the moment someone brushes past it, so anything holding full-size umbrellas wants a minimum height around 40 to 45cm and a diameter of at least 15cm at the opening.

Narrow hallways need a different shape altogether rather than a smaller version of the same stand. A slim corner design or a wall-mounted holder solves the footprint problem without sacrificing capacity, and Homable’s own sizing guide walks through exactly how to match dimensions to your entryway.
Outdoor parasol bases are not interchangeable with hallway stands. They’re built for wind load, not umbrella capacity, and need the ballast and bolting discussed above.
- Position it right by the door, not further down the hallway where it becomes a trip hazard.
- Keep it clear of the main walking path, even a 40cm stand can catch a foot in a narrow space.
- Choose a non-slip or weighted base if the floor is hard tile or polished wood.
- Add a mat or tray underneath if the stand itself doesn’t have a built-in drip catcher.
A note on how these ideas were put together
Cristiano has spent years covering home storage and decor for a home goods e-commerce site, with a particular focus on the small entryway fixes that make the biggest daily difference. Every idea here is checked against the site’s own product pages and sizing guide, so the styles discussed, ceramic, metal, woven, and wall-mounted, map directly onto what’s actually available to buy rather than staying theoretical. The aim is simple: give you something you can act on today, whether that’s ordering a stand or building one this weekend.
What actually matters here (and what doesn’t)
Most advice on umbrella stands obsesses over looks and skips the two things that determine whether the thing survives a British winter: drainage and base weight. A gorgeous ceramic urn with no liner will stain a wooden floor within a month. A slim, elegant wall holder that can’t take the weight of three soaked umbrellas will bend its bracket by Christmas.

My honest view: buy the liner before you buy the stand. Decide on drainage first, then choose the style that fits your hallway’s width and your taste. Sizing is the second most underrated factor, people default to whatever fits their aesthetic and end up with something too short for a full-length umbrella, which tips constantly and annoys everyone in the house.
If you’re building rather than buying, don’t skip sealing the wood before assembly. It’s the one step every rushed weekend project cuts, and it’s the one that actually determines whether the stand lasts three years or three months.
— Cristiano
Shop the look: Homable’s entryway range
The online store stocks the practical side of this article directly: decorative storage pieces, liners, and floor protection that turn any of the ideas above into something you can order this week rather than build from scratch.

If you’d rather buy than build, browse the Homable homepage for entryway accessories, or start with a non-slip rubber floor mat to sit under whatever stand you choose, it catches drips a liner alone can’t. For a basket-style stand, the round storage basket works well with a plastic liner dropped inside, giving you the woven look without the water damage. Check the sizing guide first so you order the right height and diameter for your hallway, then place your order and have it sorted before the next downpour.
Sources
- Parasol base build instructions — Bolton Council
- 22 umbrella stand ideas for fall entryways
- DIY wooden umbrella stand — full build with cut list and costs
FAQ
What can I use instead of an umbrella stand?
A tall vase, a galvanised bucket, a lined laundry basket, or even a repurposed planter all work as long as you add a liner or drip tray to catch water. Old ceramic urns and vintage churns are popular choices because they already have the height and stability an umbrella needs.
How can I make a DIY umbrella stand?
The simplest route is lining a tall vessel with a plastic liner and adding a layer of pebbles for weight and drainage. For something sturdier, build a wooden slatted box, seal every internal face before assembly, then fit a removable drip dish, as detailed in DIY wooden stand guides.
What makes a good umbrella stand?
A good stand combines a wide, stable base with proper drainage, ideally a removable tray or liner so water never touches the floor or the stand material itself. Height matters too: anything under about 40cm risks letting long umbrellas tip sideways.
What are some creative ways to store umbrellas?
Wall-mounted holders, painted metal buckets, monogrammed jars, and repurposed shutters all turn umbrella storage into a decorative feature rather than an afterthought. Metal mesh stands are worth considering too, since the open design helps umbrellas dry faster and cuts down on musty smells compared with fully enclosed designs.