Cart
0
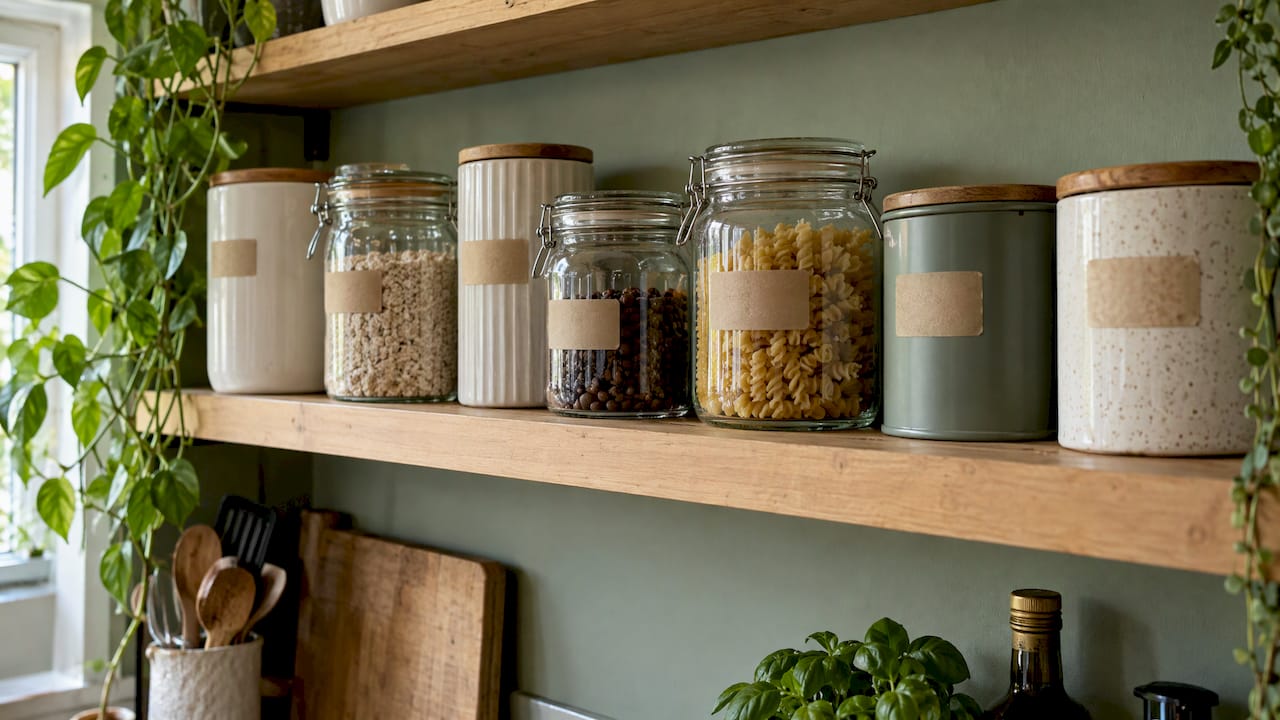
The best canister labels are short, large enough to read from across the worktop, and made from a material that suits the container and the job. Keep the wording to the item name, add an opened date only where it helps, and stick every label at the same height on the front. Below you will find what to write, how to choose a style, three ways to make labels at home, and how to apply, protect and replace them.
TL;DR
- Write the item or category name in bold, short wording. Add an opened date or the original best-before wording only where it is useful.
- Measure the flat part of the canister before you buy or print anything, and test a paper mock-up first.
- Paper is the budget choice, while BOPP and vinyl cope better with moisture and wear.
- Fill the jar to the height you want the label, use that as your straight guide, and place every label at the same height.
- Choose removable vinyl if you like to rearrange your pantry, and permanent vinyl for a label that stays for good.
Table of Contents
- Why labelling canisters is worth doing
- What to write on a canister label
- Choosing a label style, size and material
- Four ways to make canister labels
- Applying labels so they look professional
- Making labels last, and changing them later
- Placement and readability tips
- Our perspective
- Canisters ready for your labels
- A simple plan for labelling a whole shelf
- FAQ
- Sources
Why labelling canisters is worth doing
A row of matching canisters looks calm on the counter. A row of matching canisters that all look like they hold sugar is a different story. Labels turn a decorative set into a working system: anyone in the house can find the plain flour, put the tea back where it lives and see at a glance what needs buying.
Labels also let you keep a consistent look. When your canisters are the same shape and colour, the lettering becomes part of the design. That is why it pays to decide on the style once, then repeat it across tea, coffee, sugar, flour, rice, pasta and the rest.
If you are still choosing the containers themselves, our guide to kitchen canister materials compares glass, ceramic, steel and plastic, and the surface you pick affects which label will stick and look best.
What to write on a canister label
Keep it concise. One practical structure, recommended by The Small Apartment, has three parts: the item or category name, an opened date when relevant, and the original best-before or use-by wording and date. The same source advises against inventing a replacement date of your own. If the packet says a date, copy what it says rather than guessing how long the contents will last.
The name comes first
The name is the part you read every day, so give it the most space. “Plain flour”, “Brown sugar” and “Porridge oats” are clearer than clever names or abbreviations. If two canisters could be confused, add one word: “Self-raising” under “Flour”, or “Decaf” under “Coffee”.
Dates only where they help
Tea bags, sugar and salt rarely need a date on the canister. Items you open and use over a few weeks, such as flour, nuts, dried fruit or ground coffee, are better candidates. You have two simple options:
- Leave a small blank space on the label and write the opened date with a pen.
- Put the original best-before wording and date from the packet on a small separate sticker, so you can swap it when you refill.
Whichever you choose, keep the main label clean. A date that changes should not be printed into a label that is meant to last.
Group by category when you have many jars
If your pantry has dozens of containers, organise first and label second. Break your categories into subcategories before labelling, an approach recommended in this guide to labelling pantry storage. Rather than guess at it, try this simple split for a typical kitchen:
- Hot drinks: tea, coffee, hot chocolate, sweeteners
- Baking: plain flour, self-raising flour, caster sugar, icing sugar, cocoa
- Breakfast: oats, cereal, granola
- Dry goods: rice, pasta, lentils, couscous
- Snacks: biscuits, crackers, nuts
A category word in a smaller size above the item name is often enough to tell a visitor where everything belongs.
Choosing a label style, size and material
Before picking a design, look at the canister. Is the surface smooth, glazed, ribbed or embossed? Is there a flat panel, or is it fully round? Those details decide what size, shape and material will work.
Measure first, then test on paper
Box Sense recommends measuring the straight label panel and leaving a margin from any curves. For cylindrical containers, work out the circumference so the label does not wrap further than you meant it to. Allow for seams and embossed features, which can lift an edge. Then cut a paper mock-up and hold it against the container before you commit to a whole set.

A quick worked example: if your canister has a flat front panel 8 cm wide, a label 6 cm wide leaves a 1 cm margin each side. On a round canister, measure the width you want to see from the front, and keep the label narrower than that so it never wraps round the side.
Paper, BOPP or vinyl
VistaPrint describes paper as budget-friendly but vulnerable to moisture, BOPP as moisture and tear resistant, and vinyl as flexible and durable. It also notes that the material, ink, adhesive and coating all affect how a label performs. For a kitchen, where steam, grease and damp fingers are part of daily life, that points you to a sturdier material for canisters near the kettle or hob.
| Material | Best for | Watch out for |
|---|---|---|
| Paper | Budget sets, dry cupboards, labels you will change often | Moisture can damage it |
| BOPP | Worktops and pantry shelves where jars get handled | Choose a finish that suits your printer or pen |
| Vinyl | Curved, glazed or frequently wiped canisters | Needs a cutting machine or a printable vinyl sheet |
Size and lettering
Bold and short wins. Organize Every Room suggests a tracing range of 65 to 85 pt for hand-traced lettering, with shorter words larger and longer words smaller. That is one home organiser’s rule of thumb rather than a standard, so treat it as a starting point and adjust to your own canisters.
For readability, simple sans-serif letters in high contrast work best, and New England Low Vision recommends large, simple labels for exactly this reason. Dark text on a pale label, or white on a dark canister, beats a subtle tone-on-tone look. If you like a decorative script, save it for a title word and keep the item name plain.
Four ways to make canister labels
There is no single right method. Choose by how much time you have, what equipment you own and how permanent you want the result to be.
1. Cut vinyl with a cutting machine
Hobbycraft’s guide to storage jar labels takes you through the process in order:
- Design your text so the fonts and sizes are consistent across every label.
- Cut the vinyl, then weed away the excess so only the lettering remains.
- Lay transfer tape over the lettering to lift it from its backing.
- Smooth the lettering onto the middle of the jar, then peel the transfer tape away.
The result looks like painted lettering, with no visible label edge. It suits glazed ceramic and glass particularly well.
2. Print then cut
If you have a home printer and a cutting machine, printable vinyl lets you print a design with colour, then have the machine cut around it. Hobbycraft’s printed vinyl label tutorial describes scaling the design to the jar, printing onto printable vinyl, cutting on a mat and applying the finished labels to the middle of each jar. This works well for labels with a border, an icon or a pale colour wash.
3. Draw with pens on adhesive material
The Homes I Have Made describes three approaches with a cutting machine: cut vinyl, write with pens on adhesive-backed material, and print then cut. With the pen method, the machine draws the lettering and cuts the shape, and you peel the label and press it straight onto the canister. It gives a handwritten look without the wobble.
4. Trace by hand, no machine needed
You can get custom lettering without any equipment. The method from Organize Every Room uses a printed template taped inside a clear container. You trace it from the outside with an oil-based paint pen, let it dry, and correct any slip with rubbing alcohol. It suits clear containers and gives a bold, graphic effect.
Printable sticker sheets
The quickest route of all is printing onto sheets. PrintablesWorld offers jar and pantry label layouts in A4 or US Letter, with 32, 15 or 6 labels per page for small, medium and large sizes. It advises printing at 100% scale, using adhesive sticker sheets or plain paper fixed with glue or clear tape, and cutting with a craft knife and metal ruler for straight edges. In the UK, A4 is the format to pick.
Organize Every Room’s printable pantry label guide suggests clear printable sticker paper so the container stays visible beneath the label. Let the ink dry, cut the label out, clean and dry the container, then smooth the label on.

Applying labels so they look professional
Preparation does most of the work.
- Clean and dry the surface. Grease or damp stops adhesive from taking, which is why the printable guide above says to clean and dry the container first.
- Fill the jar to the height you want. Hobbycraft notes that filling jars to the intended label height gives you a straight alignment guide.
- Place at the centre. Both Hobbycraft tutorials apply the label to the middle of the jar.
- Smooth from the middle outwards. Press gently so no bubbles are trapped.
- Repeat at the same height every time. Consistent front placement at a uniform height is the other recommendation from the low vision advice above, and it also makes a shelf look neat.
If your canisters live on a shelf, think about where the eye falls. Labels at the same height on every canister create a clean line. If your containers are different heights, line up the labels with the shelf edge rather than the jar tops.
Making labels last, and changing them later
Paper is vulnerable to moisture, as noted above, so keep paper-labelled canisters away from steam. For anything near the kettle or hob, BOPP or vinyl is the safer choice.
Then decide how long you want the label to stay. Hobbycraft says removable vinyl can be taken off for up to three years, while permanent vinyl suits a label meant to stay. If you are likely to reorganise, removable vinyl is the flexible option. If your canisters have one job for life, such as a tea jar, permanent is fine.
Over time, check your labels. New England Low Vision suggests periodic inspection for fading, smudging or deterioration. A quick look when you refill a canister is enough. Replace any label that is hard to read, because a label you cannot read has stopped doing its job.
If you traced lettering with a paint pen and want to start again, rubbing alcohol is the corrector in the method above. Test it on a hidden spot first, especially on a decorated or painted canister.
Placement and readability tips
- Front and centre: the label faces out, at the same height on every canister.
- High contrast: dark on light, or light on dark. Avoid pale grey on white.
- Simple letters: a plain sans-serif is quickest to read.
- Good lighting: a label that is clear in daylight can vanish under a dim cupboard. Lighting is part of readability, as the accessibility advice above points out.
- Touch cues: for anyone who finds reading difficult, a tactile marker such as a raised dot can sit alongside the label.
Our perspective
We think labels should be the last, light touch on a canister that already looks good. A well-chosen jar in a calm finish does most of the visual work, and the lettering simply tells you what is inside.
That is how we choose for our kitchen range: pieces designed to sit on show on the worktop, where the shape, finish and colour matter as much as what they hold. A matching set with clean, consistent labels reads as a deliberate part of your kitchen styling rather than a pile of storage.
Our advice is to settle on one label style before you buy a full set, measure the canister you plan to use, and keep the wording short. Then the same approach carries across tea, coffee, sugar and everything else, and the whole shelf looks like it belongs together.
Cristiano
Canisters ready for your labels
If you are building a matching set, take a look at our ceramic tea, coffee and sugar jars, a natural trio to label first. For more storage and styling pieces, browse our kitchen collection.
For ideas on how to arrange your canisters once they are labelled, our piece on kitchen countertop decor shows how to group them with other pieces. If the wider kitchen needs an organising plan, the storage solutions checklist covers the whole home.
A simple plan for labelling a whole shelf
If you want to get it done in one afternoon, follow this order.
- List what you store. Write down every canister and what goes in it, grouped by category.
- Pick the wording. Use one or two words each. Decide where, if anywhere, a date will go.
- Measure and mock up. Cut paper rectangles to size and hold them against the canisters.
- Choose the material. Paper for a dry cupboard on a budget, sturdier BOPP or vinyl for the worktop.
- Make one test label. Apply it, check the height and legibility, then make the rest.
- Apply in a batch. Clean, dry and fill each canister to the same height, then label them all in one go.
- Review in a month. Adjust anything that is hard to read or in the wrong place.
FAQ
Should I put the date on kitchen canister labels?
Only where it is useful. If you do, record the opened date and the original best-before or use-by wording from the packet, and avoid inventing a new date of your own. A blank space on the label for a pen note is the simplest option.
What is the best type of label for kitchen canisters?
Paper is the budget option but is vulnerable to moisture. BOPP is moisture and tear resistant, and vinyl is flexible and durable, so either suits canisters on the worktop. The right choice depends on where the canister sits and how often you move things around.
How big should pantry canister labels be?
Measure the flat part of the canister and leave a margin from any curve, then test a paper mock-up before buying or printing the full set. For lettering, keep words short and bold, with shorter words larger than longer ones.
Can I remove canister labels later?
Yes, if you choose well. Hobbycraft says removable vinyl can be taken off for up to three years, whereas permanent vinyl is for labels that are meant to stay. Paint-pen lettering on a clear container can be corrected with rubbing alcohol.
Can I label canisters without a cutting machine?
Yes. Print onto adhesive sticker sheets in A4, or print on plain paper and fix it with clear tape or glue. You can also trace lettering with a paint pen onto a clear container using a printed template.
Sources
- Pantry Labels Printable: What to Write, The Small Apartment
- Custom Product Labels: Materials, Finishes and Sizing, Box Sense
- How to Make Labels for Products, VistaPrint
- How To Make Labels Like The Home Edit, Organize Every Room
- 54 Free Printable Pantry Labels, Organize Every Room
- Cricut: How to Make Storage Jar Labels, Hobbycraft
- Cricut: How to Make Printed Vinyl Labels, Hobbycraft
- How to Make Pantry Labels with a Cricut, The Homes I Have Made
- Jar & Pantry Labels Generator, PrintablesWorld
- Labeling Tips for Low Vision, New England Low Vision