
Cart
0
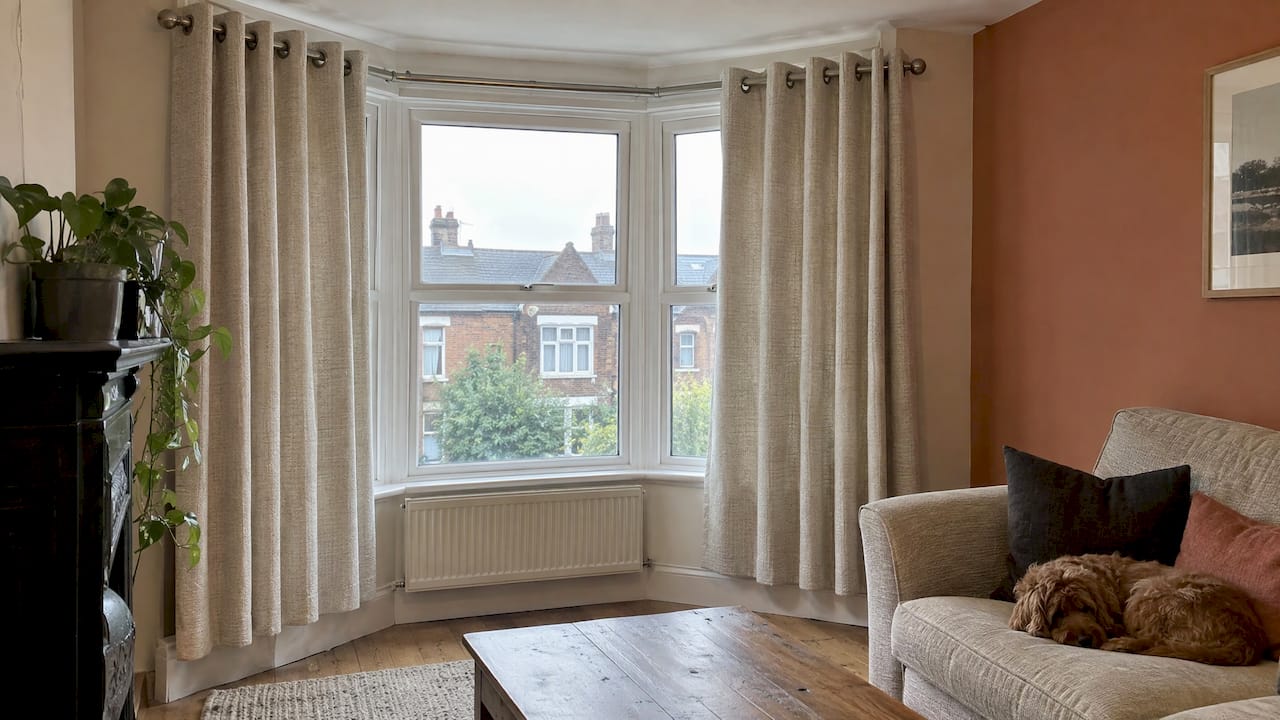
To hang eyelet curtains, fit a pole of the right diameter, thread the pole through each metal eyelet so the curtain slides on directly, then lift the pole onto its brackets and shape the folds. You need no hooks, no rings and no heading tape. This guide covers every step, from choosing the pole to dressing the folds, and it explains the difference between voile and net curtains along the way.
TL;DR
- Eyelet curtains thread straight onto the pole. Any hooks or rings in the pole kit can stay in the box.
- Match the eyelet hole to the pole: the hole must be comfortably wider than the pole, or the curtain will stick.
- Measure the drop from the top of the pole to where you want the hem, and fit the pole before you buy.
- Thread the curtain onto the pole while it is off the wall, then lift the whole thing onto the brackets.
- Voile is a sheer fabric, and net curtains are the traditional sheer, so for most windows you choose by look and privacy rather than by method of hanging.
Table of Contents
- What you need before you start
- Step 1: Choose a pole that fits the eyelets
- Step 2: Measure the drop and the width
- Step 3: Fit the brackets and pole
- Step 4: Thread the eyelet curtains onto the pole
- Step 5: Lift the pole onto the brackets
- Step 6: Shape the folds
- Common problems and quick fixes
- Voile or net curtains: what is the difference?
- Our perspective
- Finish the window with Homable
- FAQ
- Sources
What you need before you start
Eyelet curtains are the simplest style to hang, but the job goes wrong in the same few places: a pole that is too thick, brackets in the wrong spot, or a curtain that ends up too short. Gather the following before you lift a drill.
- A curtain pole with brackets and finials. Choose one wider than the window so the curtains can stack to the sides and let in light when open.
- A tape measure and a spirit level. A level pole matters more with eyelets than with any other heading, because the fabric hangs in a clean line that shows every slope.
- A pencil, a drill and the right wall plugs. Your wall type decides the plugs: masonry plugs for brick or block, plasterboard fixings for stud walls.
- A stepladder or sturdy steps. Do not balance on a chair.
- Your curtains, ironed or steamed if creased. Creases at the top are far harder to fix once the curtain is up.
- A helper. Not essential, but lifting a loaded pole onto brackets is easier with two people.
The curtains do not need rings or hooks. As one UK home guide puts it, eyelet curtains need no hooks or rings, and if your pole kit includes them you can set them aside.
Step 1: Choose a pole that fits the eyelets
Eyelets are metal rings sewn into the top of the fabric, and the pole passes through them. The two measurements that matter are the diameter of the pole and the inner diameter of the eyelet hole.
A useful rule from a UK curtain calculator: the inner hole of the eyelet should be at least 10mm larger than the pole, so the curtain glides freely. The same source lists two common UK eyelet sizes. A 40mm eyelet suits a 28mm pole, and a 50mm eyelet suits a 35mm pole.
| Eyelet inner diameter | Typical pole diameter |
|---|---|
| 40mm | 28mm |
| 50mm | 35mm |
Look at the product description of your curtains for the eyelet diameter, then check the pole listing for its thickness. If the two do not leave a gap of about 10mm, choose a slimmer pole.
Poles with a smooth, polished finish let eyelets travel more easily than rough or heavily textured ones. If you plan to open and close the curtains daily, smoothness is worth paying attention to.
Pole length and bracket choice
Fit a pole longer than the window, with room at each side. When the curtains are open they bunch into stacked folds, and if the pole stops at the window frame the folds cover part of the glass. Extra length at each end gives the folds somewhere to rest.
For wider windows, a pole that spans more than about 1.2 to 1.5 metres usually needs a centre support bracket so it does not sag under the weight of the fabric. Follow the pole manufacturer’s guidance on this, as it varies by pole thickness and material.
If you want a layered look with a sheer behind a heavier curtain, read our ideas for a double curtain rod setup, which includes mounting heights for UK rooms.
Step 2: Measure the drop and the width
The drop is the length of the curtain from the top to the hem. With eyelet curtains, the fabric hangs from the pole through the eyelets, so the top of the curtain sits just below the top of the pole, and the drop you want is measured from the pole, not from the top of the window frame.
The method:
- Decide where the pole will go. A common approach is to mount it above the window frame rather than inside the recess, which makes the window look taller and lets the curtains clear the glass.
- Fix the brackets temporarily or mark their position with a pencil.
- Measure from the underside of the pole down to your chosen finishing point.
- Decide on the finishing point: just above the sill, just below the sill, or just clear of the floor.
The finished length changes the look of a room more than almost any other detail. Our guide on UK curtain length rules walks through three measuring spots, and the how to measure curtains guide explains how to avoid short drops and thin panels. If you prefer working in millimetres, the curtain size guide covers that.
Allow for the eyelet heading
With eyelets, the metal ring sits a little way down from the top edge of the fabric. That small gap shows above the pole line, and the curtain hangs slightly lower than the pole. When you work out the drop, measure to the pole itself and check the listed drop of the curtain you are buying, which is normally given from the top of the heading to the hem.
Width and fullness
Fullness is how much fabric you have compared with the width of the pole. Too little and the curtain looks flat when closed. Too much and it bunches. According to a UK curtain calculator, eyelet curtains typically use 2× fullness, although 1.5× and 2.5× are also options. In practice, if you are buying ready-made curtains, a pair whose combined flat width is about twice the length of the pole will give you generous, even folds. A lighter fabric such as voile often looks best at the fuller end, because sheer fabric needs volume to look rich.

Step 3: Fit the brackets and pole
Fit the pole first, without the curtains, so you can check it is secure and level before you add weight.
- Mark the bracket positions. Hold the pole up and mark where each end bracket sits. Keep the brackets a few centimetres in from the pole ends so the finials have room.
- Check it is level. Place the spirit level on the pole or between marks. A pole that looks level to the eye can be out by a centimetre or more.
- Drill and plug. Use a drill bit matched to your plugs. For brick or block, use masonry plugs. For plasterboard, use fixings made for hollow walls and, where you can, find a stud or the lintel above the window.
- Screw the brackets in. Tighten fully, because a loaded pole pulls outwards and downwards.
- Add the centre bracket if the pole needs one. Mark it halfway along, level with the end brackets.
- Test the pole. Rest it in the brackets and press down gently to check there is no movement.
Bay windows need different brackets and a bendable or three-part pole, so see our bay window curtain ideas for fitting advice.
Step 4: Thread the eyelet curtains onto the pole
This is the step people ask about most. The key is to thread the curtains while the pole is off the wall, because it is far easier than feeding fabric across a fixed pole.
- Remove one finial from the pole. Lay the pole flat on a bed or a clean floor.
- Unpack the curtain and find the top edge, with the eyelets. Check the curtain’s right side is facing the way you want it to, usually the front of the fabric facing the room.
- Feed the pole through the first eyelet. Start with the eyelet nearest the leading edge, the edge that will sit at the centre of the window, or start from the outer edge if that is easier.
- Gather the fabric as you go. Push each eyelet along the pole and gather the fabric into loose folds. Work through every eyelet in turn. Do not skip one, or the heading will pull unevenly.
- Check the eyelet count is even. Curtains are designed with an even number of eyelets so that both edges fold back towards the window. Count your eyelets, as the first and last eyelets should face the same way.
- Repeat with the second curtain if you have a pair. Thread it from the opposite end so the pair is symmetrical.
- Refit the finial and tighten it.
If you cannot take a finial off, for example with a fixed decorative end, some poles allow you to thread the curtains from the bracket side. If you have a pole with a centre bracket, thread the curtain onto each half, with the bracket supporting the join, or choose a pole system designed for centre supports with eyelet curtains.
Step 5: Lift the pole onto the brackets
With the curtains on, lift the pole with a helper at each end and place it on the brackets. Fix it in place with the grub screws or catches that come with the brackets. Check the pole is secure and that the curtains can slide.

If you live alone, lift one end onto its bracket first and rest the other end on your shoulder or on steps while you seat it. Do it slowly. A pole loaded with a pair of lined curtains is heavier than it looks.
Step 6: Shape the folds
Eyelet curtains make a deep, even wave when dressed well. A good result needs a few minutes of setting up.
- Space the eyelets evenly. Eyelets are normally set about 12 to 18cm apart according to one calculator for eyelet curtains. Slide them along so each fold is the same width.
- Pull the curtain to the closed position and arrange the folds so each eyelet falls into an S-shaped wave, with the fabric between two eyelets folding back and the next forward.
- Open the curtain and keep the folds in place with your hands, from the top down to the hem. Fix a loose tie around the middle of the gathered curtain and leave it for a day or two to train the folds.
- Smooth the front of each fold by running your hand down the fabric.
Adding fullness with spacers
A tip from DIY forums is to put cardboard tubes, such as empty toilet roll centres, inside the folds at the top to hold the wave open. This is a styling trick rather than a requirement. It works best on lighter eyelet curtains that tend to flop, and you can remove the tubes once the curtains have settled.
Using tiebacks
Tiebacks hold open curtains neatly and show off the folds. Fit them a little below the middle of the curtain drop. Our curtain tieback placement guide has a chart for height and position.
Common problems and quick fixes
The curtains will not slide. The pole may be too thick for the eyelets, or the finish may be rough. Check the 10mm gap rule from Step 1. A wipe with a dry cloth can help, and you should never spray the pole with oil, which stains fabric.
One curtain looks higher than the other. The pole is not level or one bracket has slipped. Check with the spirit level and tighten the grub screws.
The curtains look flat when closed. There is not enough fabric for the width of the pole. Eyelet curtains look best with generous fullness, so a wider pair may be the answer.
The curtains are too short. The drop was measured to the window rather than from the pole, or the pole was fitted lower than planned. Fit the pole before you buy, and read our guide on avoiding short drops.
The top sags between the eyelets. The curtain is heavy and the pole is flexing. A centre bracket or a sturdier pole solves this.
Light leaks at the edges. Extend the pole beyond the frame and choose a width that overlaps the window. For light control by room, see the comparison of sheer and blackout curtains.
Voile or net curtains: what is the difference?
Because eyelet curtains often come in sheer fabrics, many readers also ask whether they should choose voile or net.
What voile is
Voile is a soft, sheer fabric. According to Wikipedia’s entry on voile, it is usually made of 99% cotton or cotton blended with linen or polyester. The same entry notes that as a curtain fabric it is similar to net curtains, and that its semi-transparent quality makes heading tape less noticeable through the fabric.
How voile and net compare
In everyday UK shopping the two words overlap, and many retailers use them loosely. The practical differences are these:
| Voile | Net curtain | |
|---|---|---|
| Look | Soft, flowing, drapes in gentle folds | Often a more structured, open mesh or woven pattern |
| Daylight | Lets in plenty of light, with a diffused glow | Lets in light, with the pattern giving a more obvious screen |
| Daytime privacy | Moderate, as shapes are visible close to the glass | Often a little more, depending on the weave |
| Typical use | Layered in front of heavier curtains or used alone | Traditionally hung close to the glass on a wire or slim rod |
| Eyelet versions | Common, and they hang well in deep folds | Available, though the stiffer mesh gives a flatter wave |
These are general characteristics, and individual products vary, so read the product description for the fabric and weight. A voile eyelet curtain on a pole is the more contemporary choice. A traditional net on a wire suits a window where you want a plain privacy screen close to the glass.
Either way, the method for hanging is the same as above. For lightweight sheers, choose a slim pole so the eyelets sit neatly, and use generous fullness so the fabric does not look thin.
Our perspective
We think the curtain is the most forgiving way to change the look of a room, and eyelet curtains are the easiest place to start. There are no hooks to count and no tape to pull up, so the whole job comes down to three decisions: where the pole goes, how long the drop is, and how full the folds are.
Our advice is to treat the window as a layered space. A sheer or voile layer gives you daytime privacy and soft light. A heavier curtain gives you warmth and darkness for the evening. Natural materials, such as the bamboo blinds and curtains in our range, sit well with either layer and add texture without clutter.
Before you buy anything, fit the pole and measure from it. Most disappointments with curtains come from a drop measured to the wrong point, and a few minutes with a tape measure avoids them. We design our guides around UK homes and UK window sizes for that reason.
Cristiano
Finish the window with Homable
Once your curtains are up, the window often needs one more layer, or the room needs a few finishing touches. At Homable we stock bamboo roller blinds and bamboo curtains in natural tones that work well on their own or behind a curtain, as well as rugs, ornaments, wall shelves and other home accessories to complete a room.

Browse the full range on the Homable homepage, where orders over £100 ship free.
FAQ
What is the proper way to hang eyelet curtains?
Fit a level pole above the window, then thread the pole through each eyelet while it is off the wall. Refit the finial, lift the pole onto the brackets and arrange the folds evenly. You need no hooks or rings, because the pole passes through the eyelets directly.
How is the drop measured on an eyelet curtain?
Measure from the underside of the fitted pole down to where you want the hem to finish, whether just above the sill, below it or near the floor. Then compare that figure with the drop listed on the curtain. Fit the pole first so the measurement is accurate.
Can I use eyelet curtains on a rail made for pencil pleat curtains?
Eyelet curtains need a pole or a rod that passes through the eyelets, so a track designed for hooks does not suit them. Swap to a pole of the right diameter, and check the 10mm gap between pole and eyelet hole.
Is voile the same as net curtain?
The two are close. Voile is a soft sheer fabric, often cotton or a blend, and it is similar to net curtains in use. Many retailers use the terms loosely, so check the product description for fabric and weight.
How many eyelets should a curtain have?
An even number, so that both edges fold back towards the window. Eyelets are normally spaced about 12 to 18cm apart, and the curtain’s listing will state the count.