Cart
0
TL;DR:
- Creating a table centerpiece involves balancing aesthetics with function through proportional rules and practical techniques. Proper preparation, including selecting suitable vessels and tools, ensures stability and visual appeal. Testing sightlines before final assembly helps avoid obstructing conversations and enhances overall table harmony.
Step by step centerpiece creation is the process of assembling a decorative focal point for a table using design principles, proportional rules, and practical techniques that balance aesthetics with function. The industry term for this practice is floral or decorative table arrangement, and it covers everything from a simple candle cluster to a layered floral display. Two rules govern every successful design in 2026: the 12-inch height rule for unobstructed sightlines, and the proportional sizing standard that matches your arrangement to your specific table shape. Get these right and your centrepiece works for the room, not against it.
What tools and materials do you need before you start?
Preparation determines the quality of your finished centrepiece. Arriving at your workspace without the right tools forces improvisation, and improvisation produces uneven, unstable results.
Vessels and containers
Your vessel sets the visual tone before a single flower or candle goes in. Low, wide bowls suit clustered arrangements on round tables. Tall cylinders work for elongated, vertical designs on rectangular tables. Lanterns and trays create a layered, lifestyle feel without any floristry skill at all.
Floristry tools and mechanics
The core toolkit is small but non-negotiable.
- Clippers or floristry scissors for clean stem cuts
- Floral foam or wire mesh grid to anchor stems securely
- Kenzan (pin frog) for heavier stems and sculptural arrangements
- Floristry adhesive or tape to fix mechanics to the vessel base
- Waterproof tray or liner to protect your table surface
Securing a kenzan with floristry adhesive shaped into a firm roll and pressed to the vessel base prevents wobbling arrangements. That single step stops most stability problems before they start.
Materials and decorative accents
| Material | Purpose |
|---|---|
| Focal flowers (roses, peonies, dahlias) | Primary visual interest and colour |
| Foliage and greenery (eucalyptus, ferns) | Framework and texture |
| Filler flowers (gypsophila, wax flower) | Gap filling and softness |
| Candles or tea lights | Warmth and atmosphere |
| Decorative accents (berries, seed heads) | Texture and seasonal character |
Pro Tip: Hydrate your floral foam by letting it float in water rather than pushing it under. Forcing it down traps air pockets that dry out stems prematurely.
Cut stems at a 45° angle and place them in water immediately after cutting. This keeps the vascular tissue open and extends freshness by a meaningful margin.
How do you plan your design for your table shape and occasion?
Good centrepiece design starts with measurements, not inspiration. Knowing your table dimensions before you choose a vessel saves money and prevents the most common sizing mistakes.
Applying the proportional rules
For rectangular or oval tables, centrepiece length should cover roughly 33% of the total table length. Width should fall within 20–35% of the table width. These proportions keep the arrangement visible without crowding place settings or blocking the view across the table.
For round tables, a clustered or domed shape reads best. For square tables, a symmetrical square or circular arrangement maintains visual balance. Matching your centrepiece shape to your table geometry is the single fastest way to make a design look intentional rather than accidental.
The 3-2-1 formula
The 3-2-1 formula structures any centrepiece without overcomplicating it. One focal point draws the eye. Two types of texture (smooth petals against rough foliage, for example) create depth. Three height levels give the arrangement movement and prevent it looking flat.
This formula works for floral designs, candle arrangements, and mixed decorative displays alike. Apply it and you avoid the two most common amateur mistakes: clutter and monotony.
Testing before you commit
- Place your vessel on the table and sit down in a dining chair.
- Check that you can see the person opposite clearly.
- Confirm no element forces you to lean sideways to make eye contact.
- Adjust height or width until sightlines are fully clear.
Sitting at the table to test sightlines is the step most home decorators skip. Skipping it is why so many centrepieces look great standing up but feel obstructive at a meal.
Pro Tip: Photograph your test arrangement from seated height on your phone. The camera reveals proportion problems your eye misses when you are standing over the table.
Step by step instructions for assembling your DIY centrepiece
Allow 30–60 minutes per table for assembly, including final adjustments. If you are setting multiple tables for an event, do a full practice run at least one day before. That practice run cuts your actual setup time significantly and removes guesswork on the day.
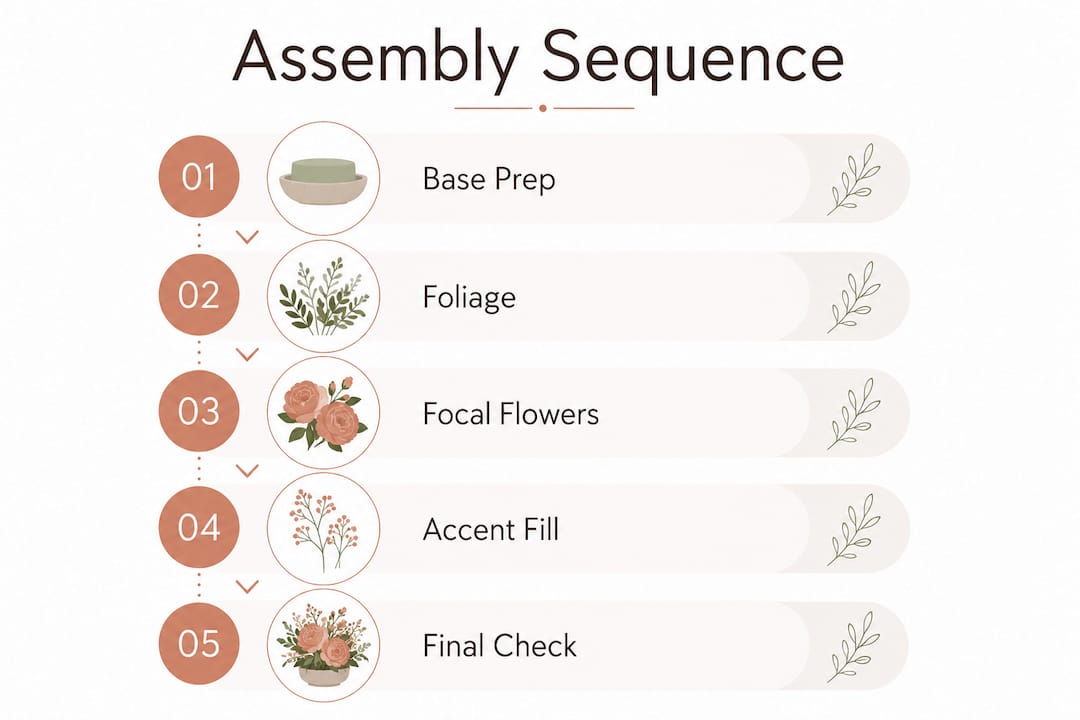
The assembly sequence
Step 1: Prepare your base
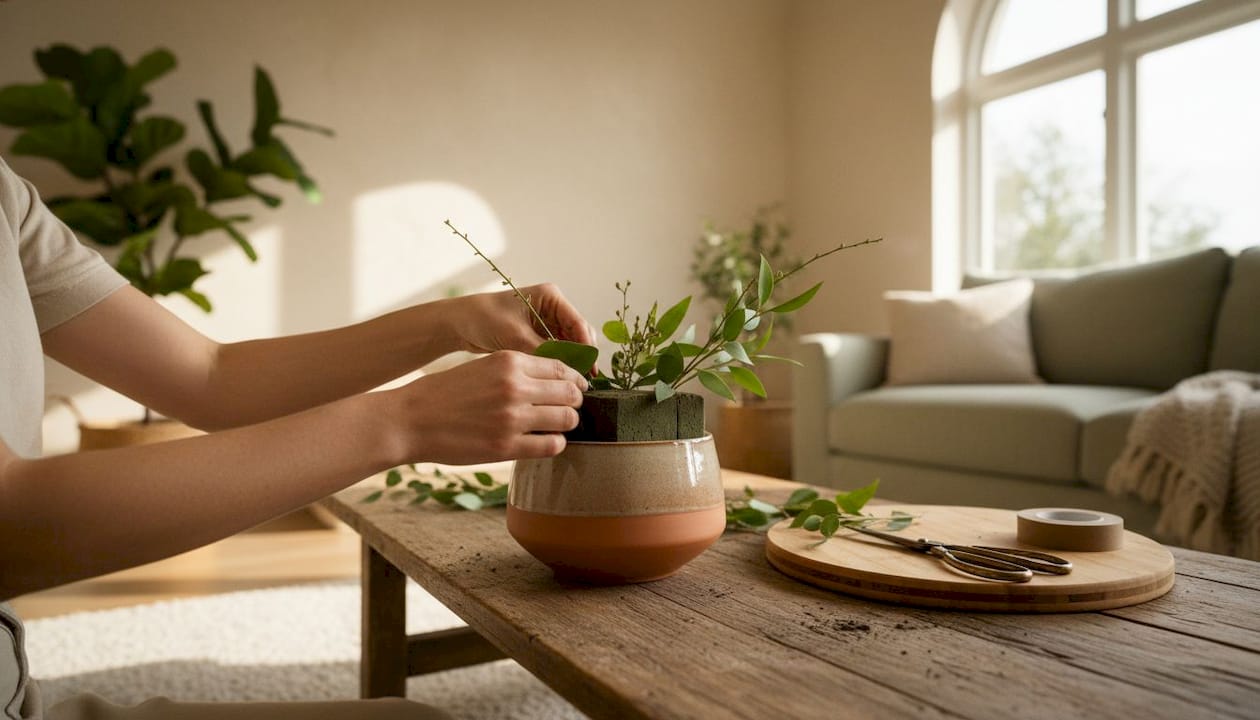
Place your vessel on a waterproof liner. Fix your floral foam, wire mesh, or kenzan securely using floristry tape or adhesive. The mechanics must not shift when you apply pressure. A wobbly base at step one means an unstable arrangement at step five.
Step 2: Build the foliage framework
Insert greenery first to establish the overall shape and scale. Foliage defines the outer boundary of your arrangement. Keep it within your planned proportions. Eucalyptus, ruscus, and Italian ruscus are reliable choices because they hold their shape and stay fresh for several days.
Step 3: Place your focal flowers
Add your largest, most visually dominant flowers next. Position them slightly off-centre for a natural look, or symmetrically for a formal one. Follow the spiral technique: rotate the arrangement a quarter turn after each stem to distribute flowers evenly around the full circumference.
Step 4: Fill gaps with accent materials
Add filler flowers, berries, or seed heads to cover any visible foam or mechanics. These smaller elements also soften the transition between focal flowers and foliage. Check the arrangement from all four sides, not just the front.
Step 5: Final adjustments
Check symmetry, height, and stability. Trim any stems that push beyond your planned proportions. Sit at the table and confirm sightlines are clear. Mist lightly with water if using fresh flowers.
| Step | Action | Time estimate |
|---|---|---|
| 1. Base preparation | Fix mechanics securely in vessel | 5 minutes |
| 2. Foliage framework | Establish shape and outer boundary | 10 minutes |
| 3. Focal flowers | Place dominant blooms using spiral technique | 15 minutes |
| 4. Gap filling | Add fillers and accent materials | 10 minutes |
| 5. Final adjustments | Check symmetry, height, and sightlines | 5–10 minutes |
Pro Tip: If you are setting more than two tables, pre-package stems per table in labelled bags and photograph your prototype from multiple angles. This standardises every table and removes last-minute chaos.
For broader dining room styling context, the centrepiece works best when it connects visually to the rest of the table setting, including linens, crockery, and candle holders.
What are the most common centrepiece mistakes and how do you fix them?
Most centrepiece problems fall into four categories: wrong scale, instability, colour clash, and poor flower care. Each has a straightforward fix.
- Too tall: Any element above 12 inches blocks eye contact across the table. Cut stems shorter or switch to a lower vessel.
- Too wide: An oversized arrangement crowds place settings and makes serving awkward. Reduce the footprint by removing outer foliage stems.
- Unstable base: A top-heavy arrangement tips if the vessel is too narrow or the mechanics are not fixed. Add a weighted insert or switch to a broader, heavier vessel.
- Colour clash: Mixing too many unrelated colours creates visual noise. Limit your palette to two or three tones and use foliage as a neutral bridge.
- Wilting flowers: Stems cut straight across cannot absorb water efficiently. Recut at 45° and change the water daily.
- Visible mechanics: Exposed foam or tape reads as unfinished. Cover with moss, foliage, or decorative pebbles.
A centrepiece that forces guests to lean around it or shout across it has failed its primary purpose, regardless of how beautiful it looks. Functionality and aesthetics must work together, not compete.
Pro Tip: Test your colour palette before assembly by laying all your materials flat on a white surface. Colours that clash on a white background will clash in the arrangement.
Pairing your centrepiece with complementary home accessory ideas around the room creates a cohesive look that extends beyond the table itself.
Key takeaways
Successful centrepiece creation requires proportional planning, stable mechanics, and a tested design before the event day.
| Point | Details |
|---|---|
| Apply the 12-inch rule | Keep all elements at or below 12 inches to maintain clear sightlines across the table. |
| Use proportional sizing | Cover 33% of table length and 20–35% of table width for balanced, comfortable arrangements. |
| Follow the 3-2-1 formula | One focal point, two textures, and three height levels create visual interest without clutter. |
| Prepare mechanics first | Fix foam, kenzan, or wire mesh securely before adding any flowers or foliage. |
| Test seated before finalising | Sit at the table to confirm no element blocks conversation or forces guests to lean. |
Why I always audition my materials before I commit
The advice I give every home decorator who asks me about centrepiece creation is this: pull everything you are considering onto the table before you cut a single stem. Lay out your vessel, your foliage, your focal flowers, your candles, and any decorative accents side by side. Auditioning items together based on a shared colour palette reveals clashes and gaps that no amount of planning on paper will catch.
The other thing I have learned from years of table styling is that most people underestimate the power of texture contrast. A smooth, glossy peony next to a rough, matte eucalyptus stem creates more visual interest than three different flower varieties in the same finish. Texture does the work that colour alone cannot.
My honest advice on trends: the 2026 move toward contemporary home styling favours restraint over abundance. Fewer elements, chosen deliberately, outperform a crowded arrangement every time. Trust the 3-2-1 formula, test your sightlines seated, and resist the urge to add one more thing.
— Cristiano
Homable’s decorative accessories for your table styling
Creating a centrepiece is only part of the picture. The accessories surrounding it determine whether the whole table reads as considered or coincidental.

Homable stocks a curated range of decorative pieces that pair naturally with DIY centrepieces. The Decorative Silver Flower Candle Holder adds metallic texture and warm candlelight alongside floral arrangements, without competing for attention. For a more sculptural accent, the Abstract Silver Couple Ornament brings a contemporary focal point that works on sideboards and console tables as well as dining surfaces. Orders over £100 qualify for free shipping, making it straightforward to build a complete table styling scheme in one order.
FAQ
What is the 12-inch rule for centrepieces?
The 12-inch rule states that no decorative element on a dining table should exceed 12 inches in height. This preserves natural eye contact and unobstructed conversation across the table.
How long does it take to make a DIY centrepiece?
Allow 30–60 minutes per table for assembly and adjustments. A practice run the day before an event reduces setup time and removes uncertainty on the day itself.
What is the 3-2-1 formula in centrepiece design?
The 3-2-1 formula combines one focal point, two types of texture, and three height levels. It creates visual interest and balance without producing a cluttered or monotonous arrangement.
How do I keep flowers fresh in a centrepiece?
Cut stems at a 45° angle immediately before placing them in water or soaked floral foam. Change the water daily and keep the arrangement away from direct heat sources.
How big should a centrepiece be for a rectangular table?
The centrepiece length should cover roughly 33% of the table length, and the width should fall within 20–35% of the table width. These proportions maintain dining comfort while keeping the arrangement visually prominent.